Crafting is one of the hobbies I enjoy but don't write about that much, mainly because I haven't been confident I could produce interesting "how did I do this?" content. I just completed a crafting project recently, however, and I decided it would be fun to try writing a breakdown of the process I followed. Fingers crossed it's an interesting read!

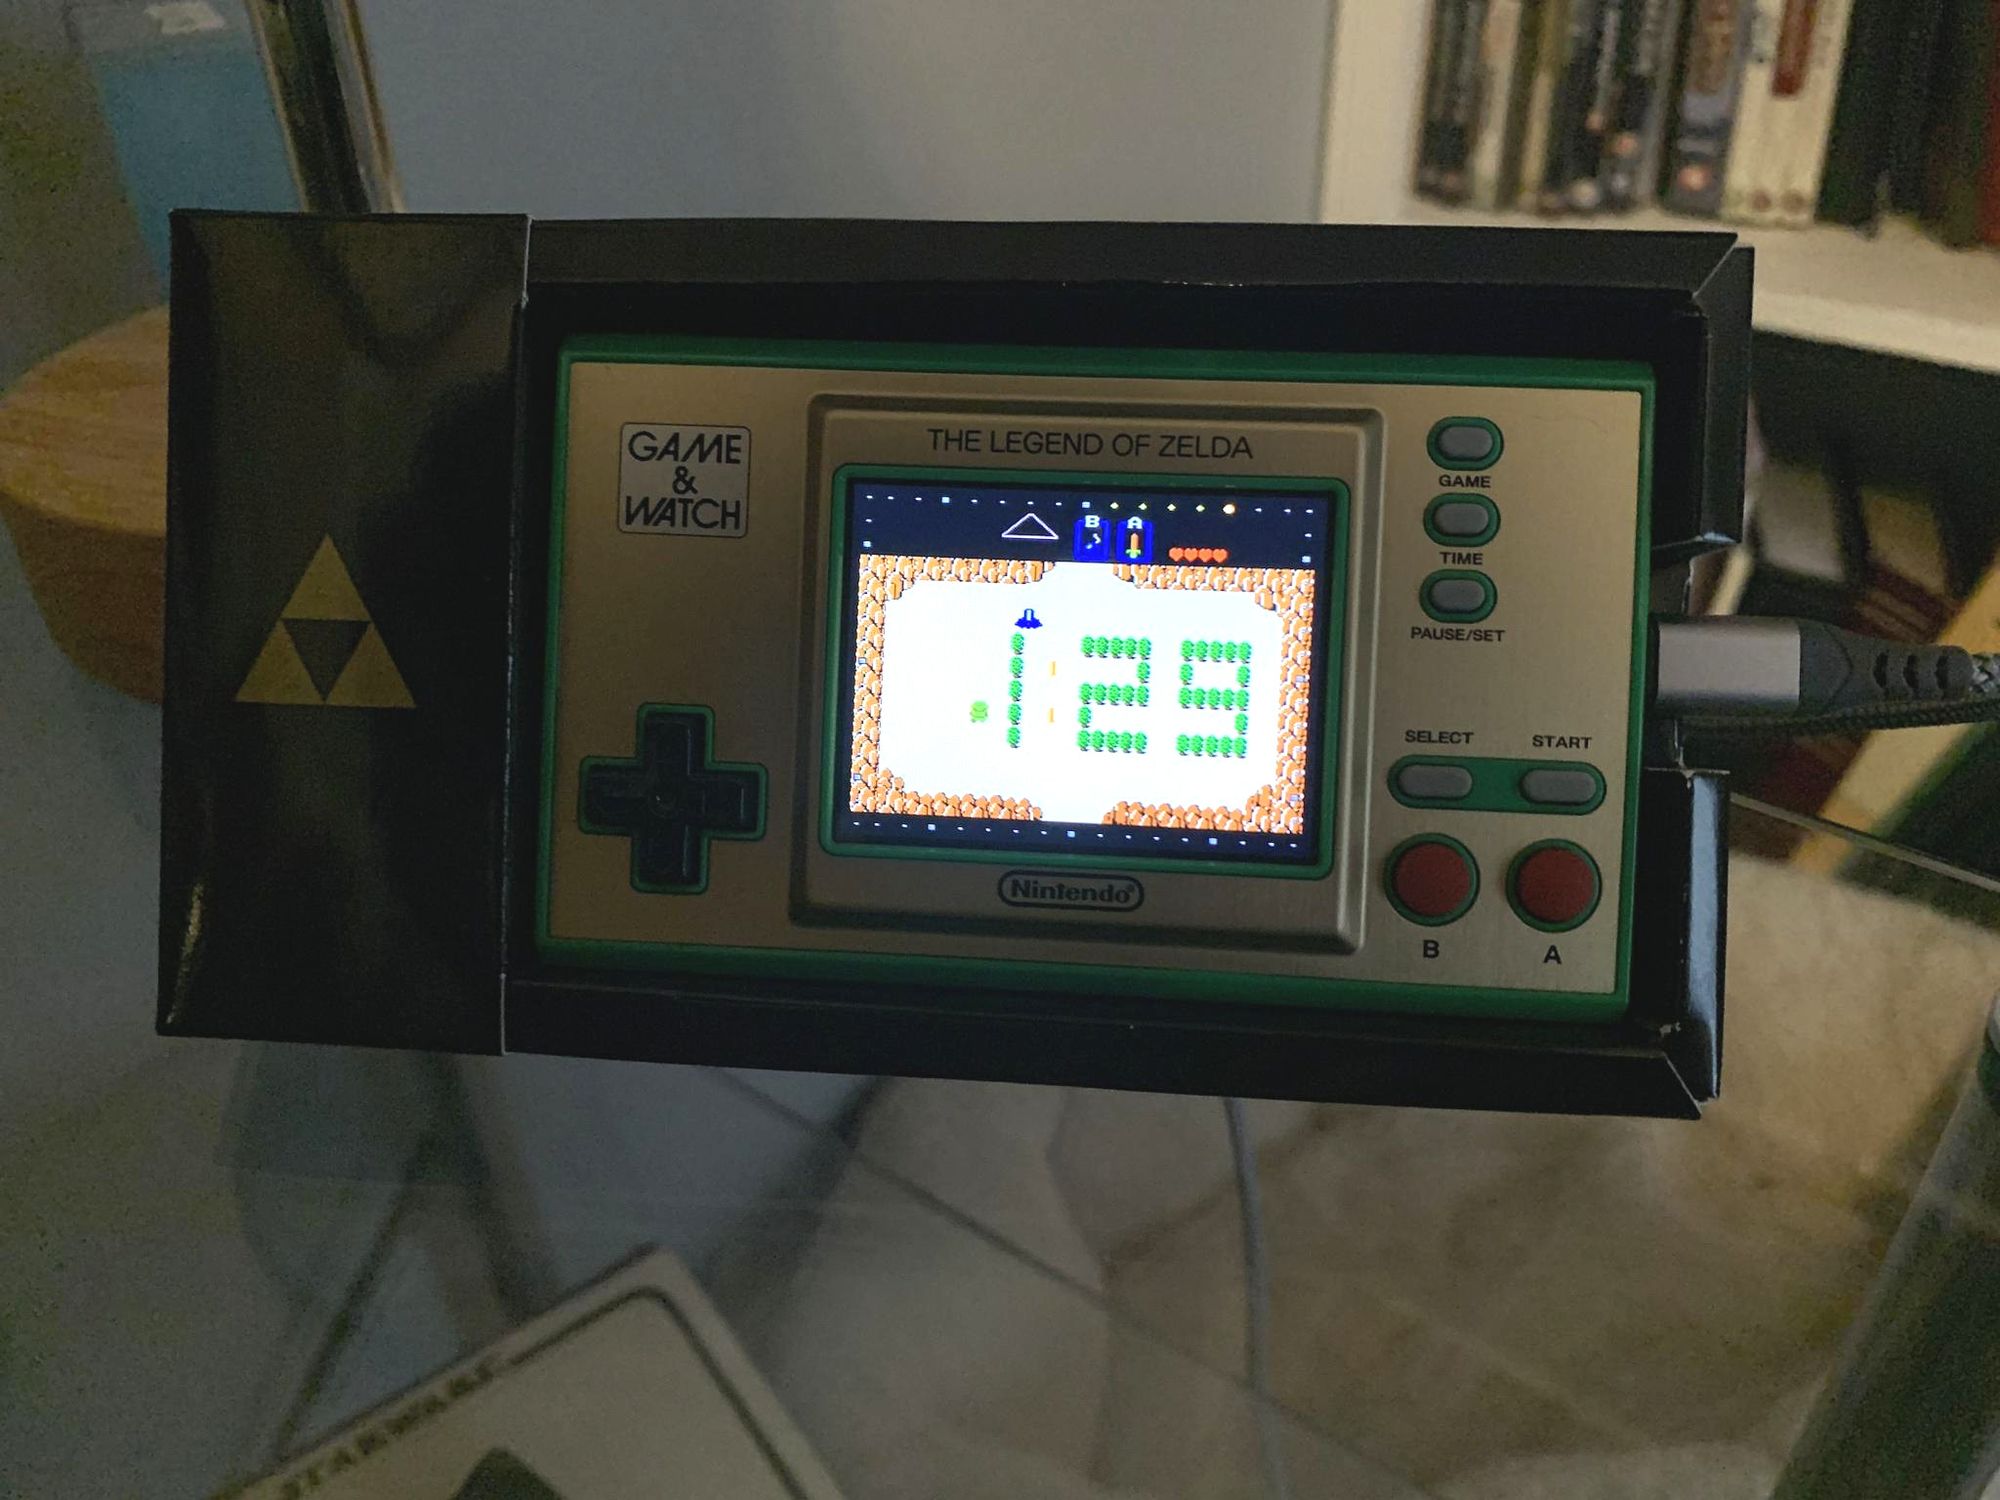
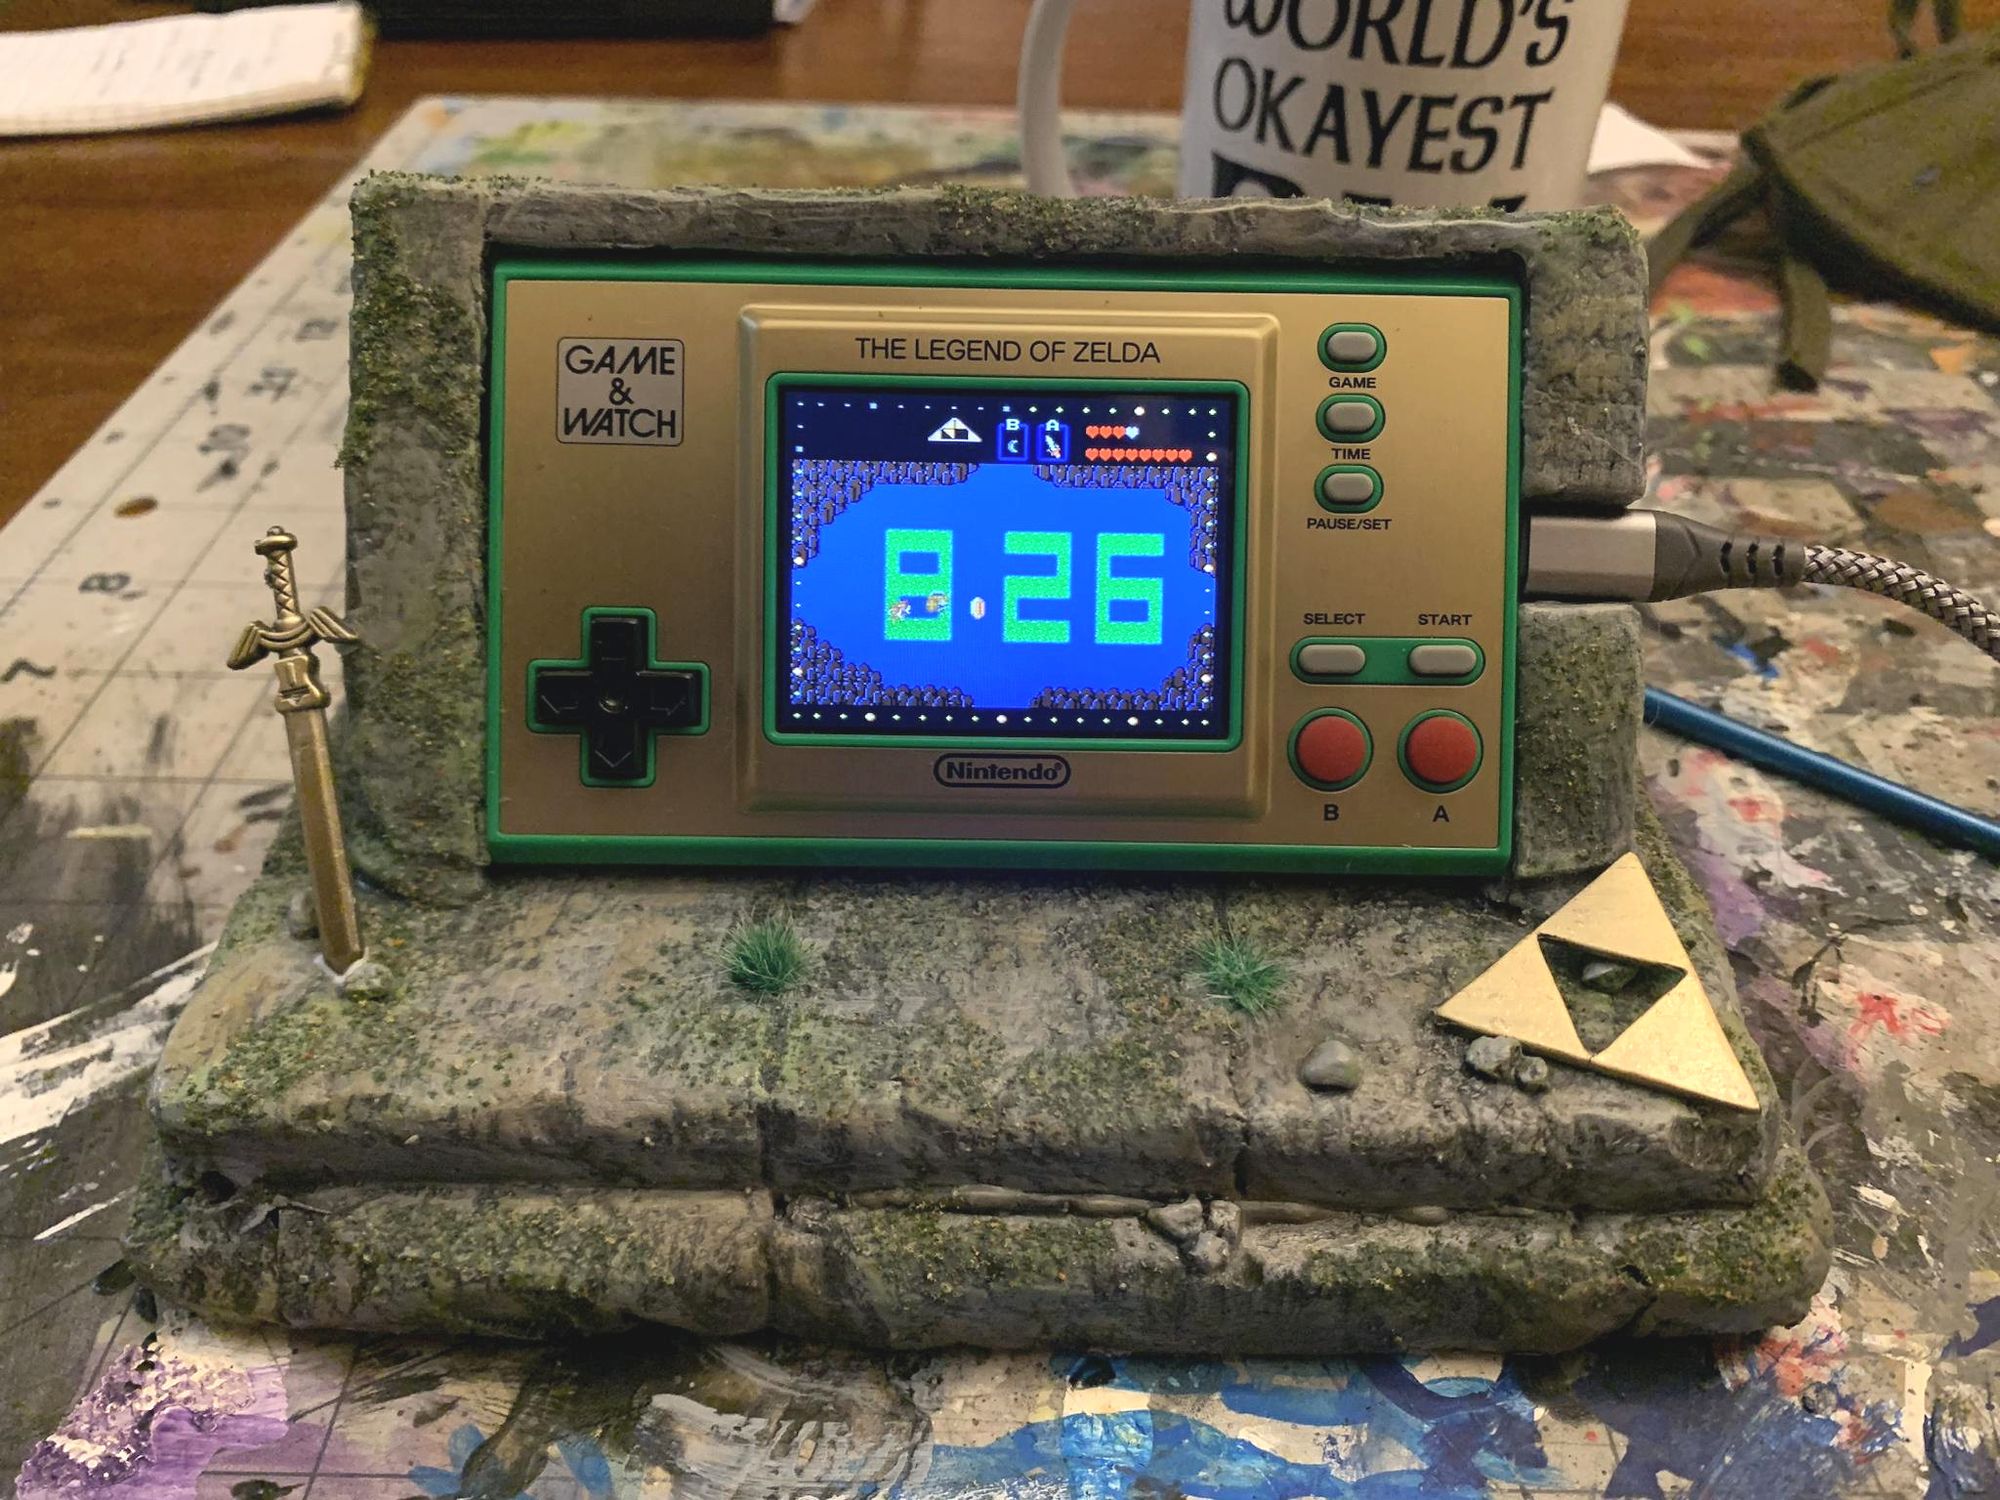
A little over a year ago, one of my loving family was kind enough to give me Zelda: Game and Watch for Christmas. To say I was delighted would be an understatement.
I had no illusions about the actual value of the thing. Zelda: Game & Watch, at best, was a novelty item. It packaged a few classic games (that I already had access to) into a nostalgic package with a few cute features for good measure. My favorite of these? The clock function.
With the right setting, you could set the little handheld up as a functioning clock, complete with an endless game of The Legend of Zelda running in the background. I've had it on the end table next to my bed since the morning of that Christmas. It is absolutely one of my favorite little gadgets.
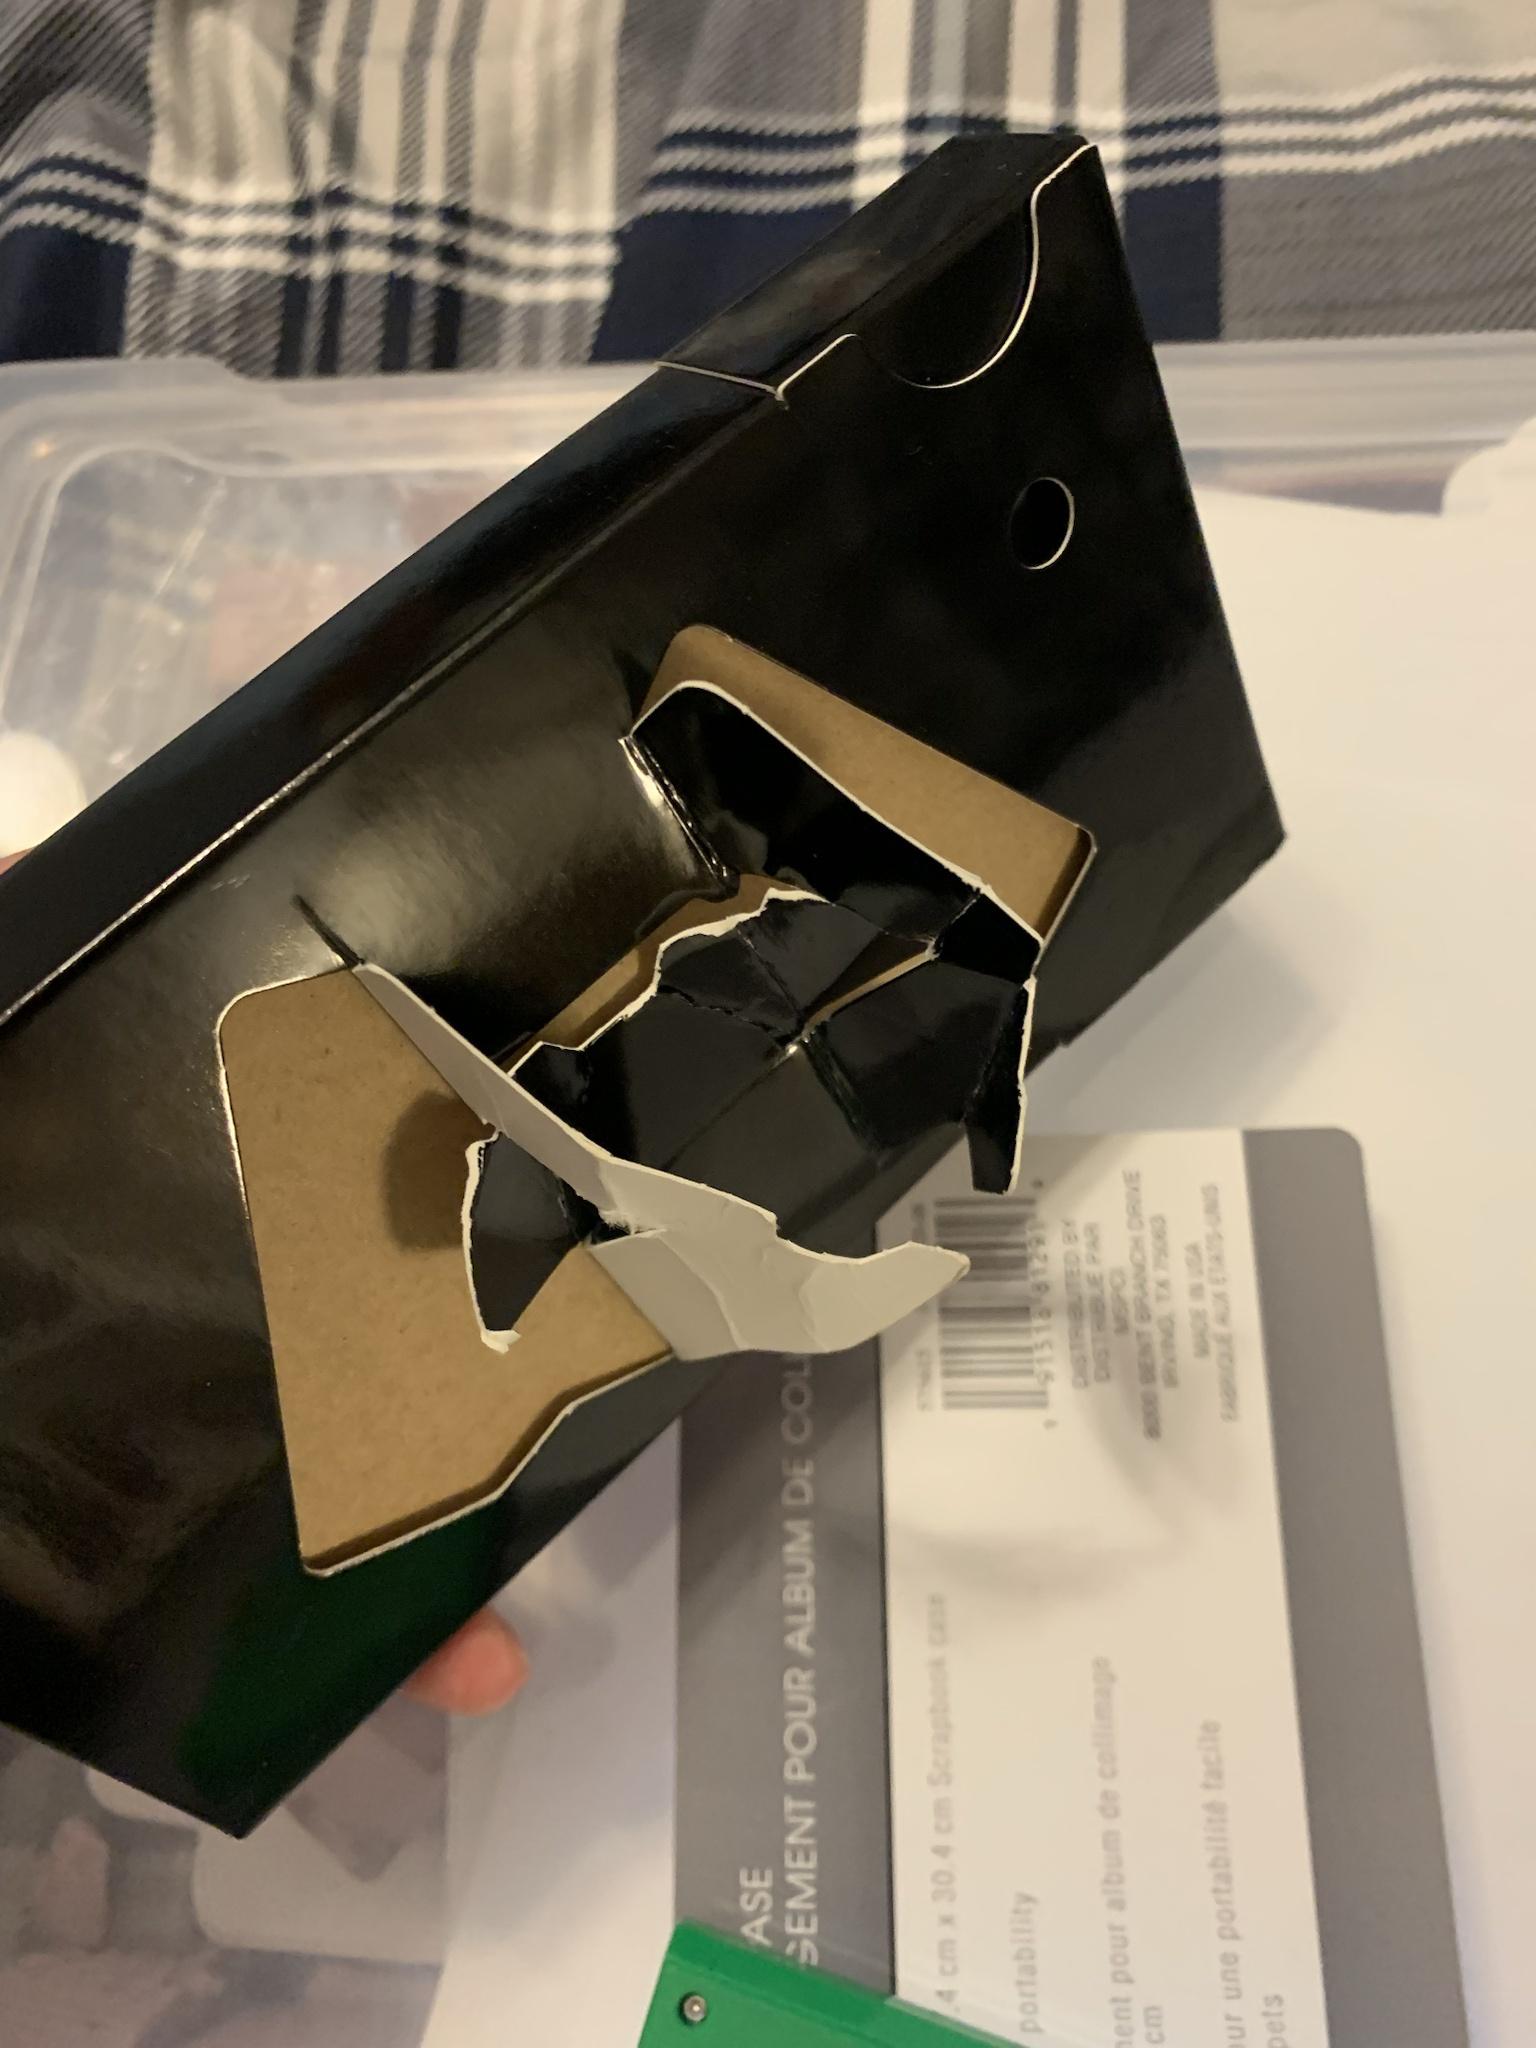
The only problem? The clock stand that Nintendo packaged it with was made of flimsy cardboard. Cardboard that has grown gradually weaker and more smushed until, just recently, it stopped standing up altogether. I felt like my little clock deserved better! And I had an idea in mind to make "better" happen.
The Plan, the Skills, and the Materials
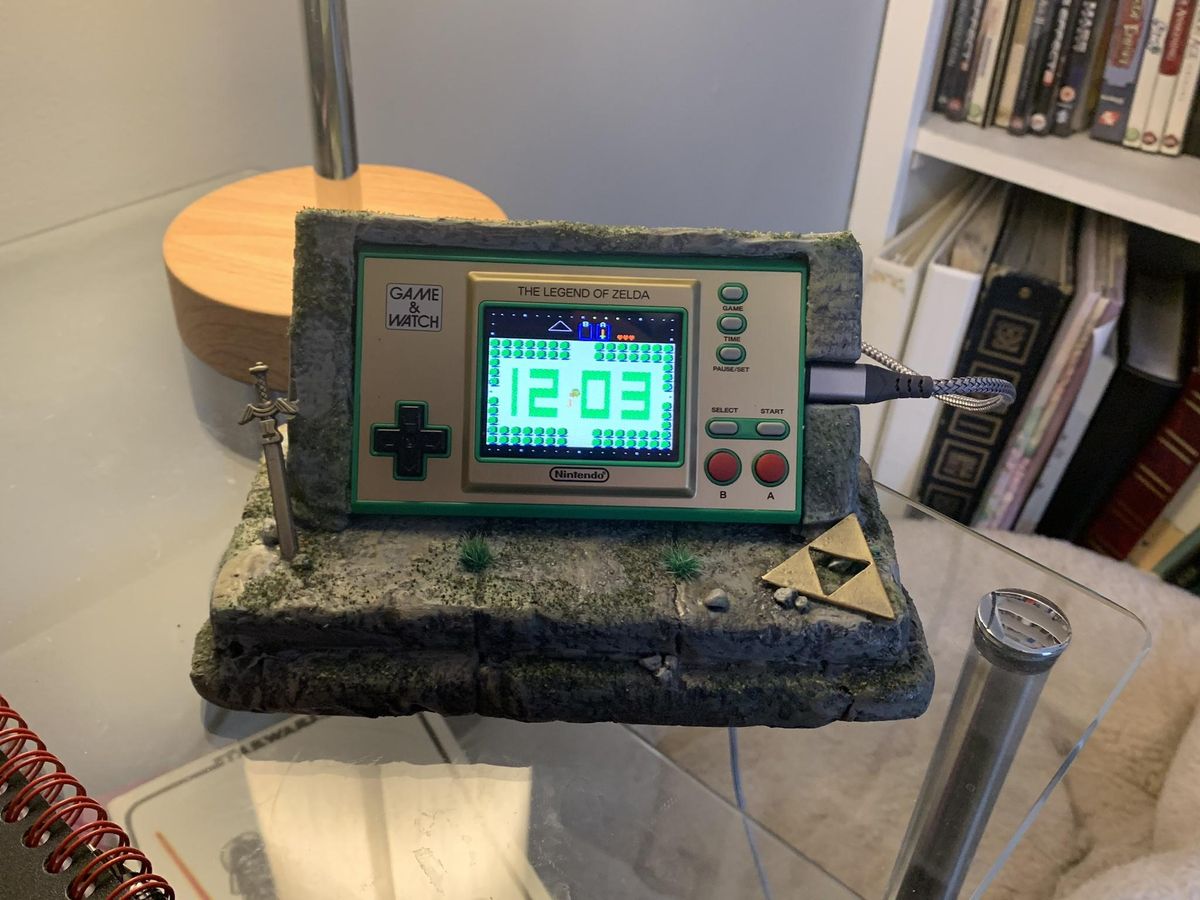
While The Legend of Zelda is a gaming franchise that has embraced several aesthetics over the years, its most consistent are rooted in medieval fantasy. I decided I wanted to construct a clock stand that reflected that. I envisioned something from the ruins of a crumbling castle - aging cracked stone that had been resting undisturbed for centuries.
I am by no means an expert crafter, but I have made some terrain pieces (some elaborate) for my tabletop RPG games. I learned a lot from watching crafting-focused YouTube channels, and stone, in particular, was something I felt comfortable with.
In terms of materials, I was pretty sure I already had everything I needed. My primary material would be XPS insulation foam (purchased from Home Depot), with a lot of hot glue, Elmer's glue, and acrylic paint. I also already had a stockpile of I could tap into for finer details, including some Zelda-specific items I had purchased years ago for just this sort of project.
Step 1: Assembling the Stand
Probably was the hardest part starting. That's because it was also the part that required the most work in terms of measurement and precision.
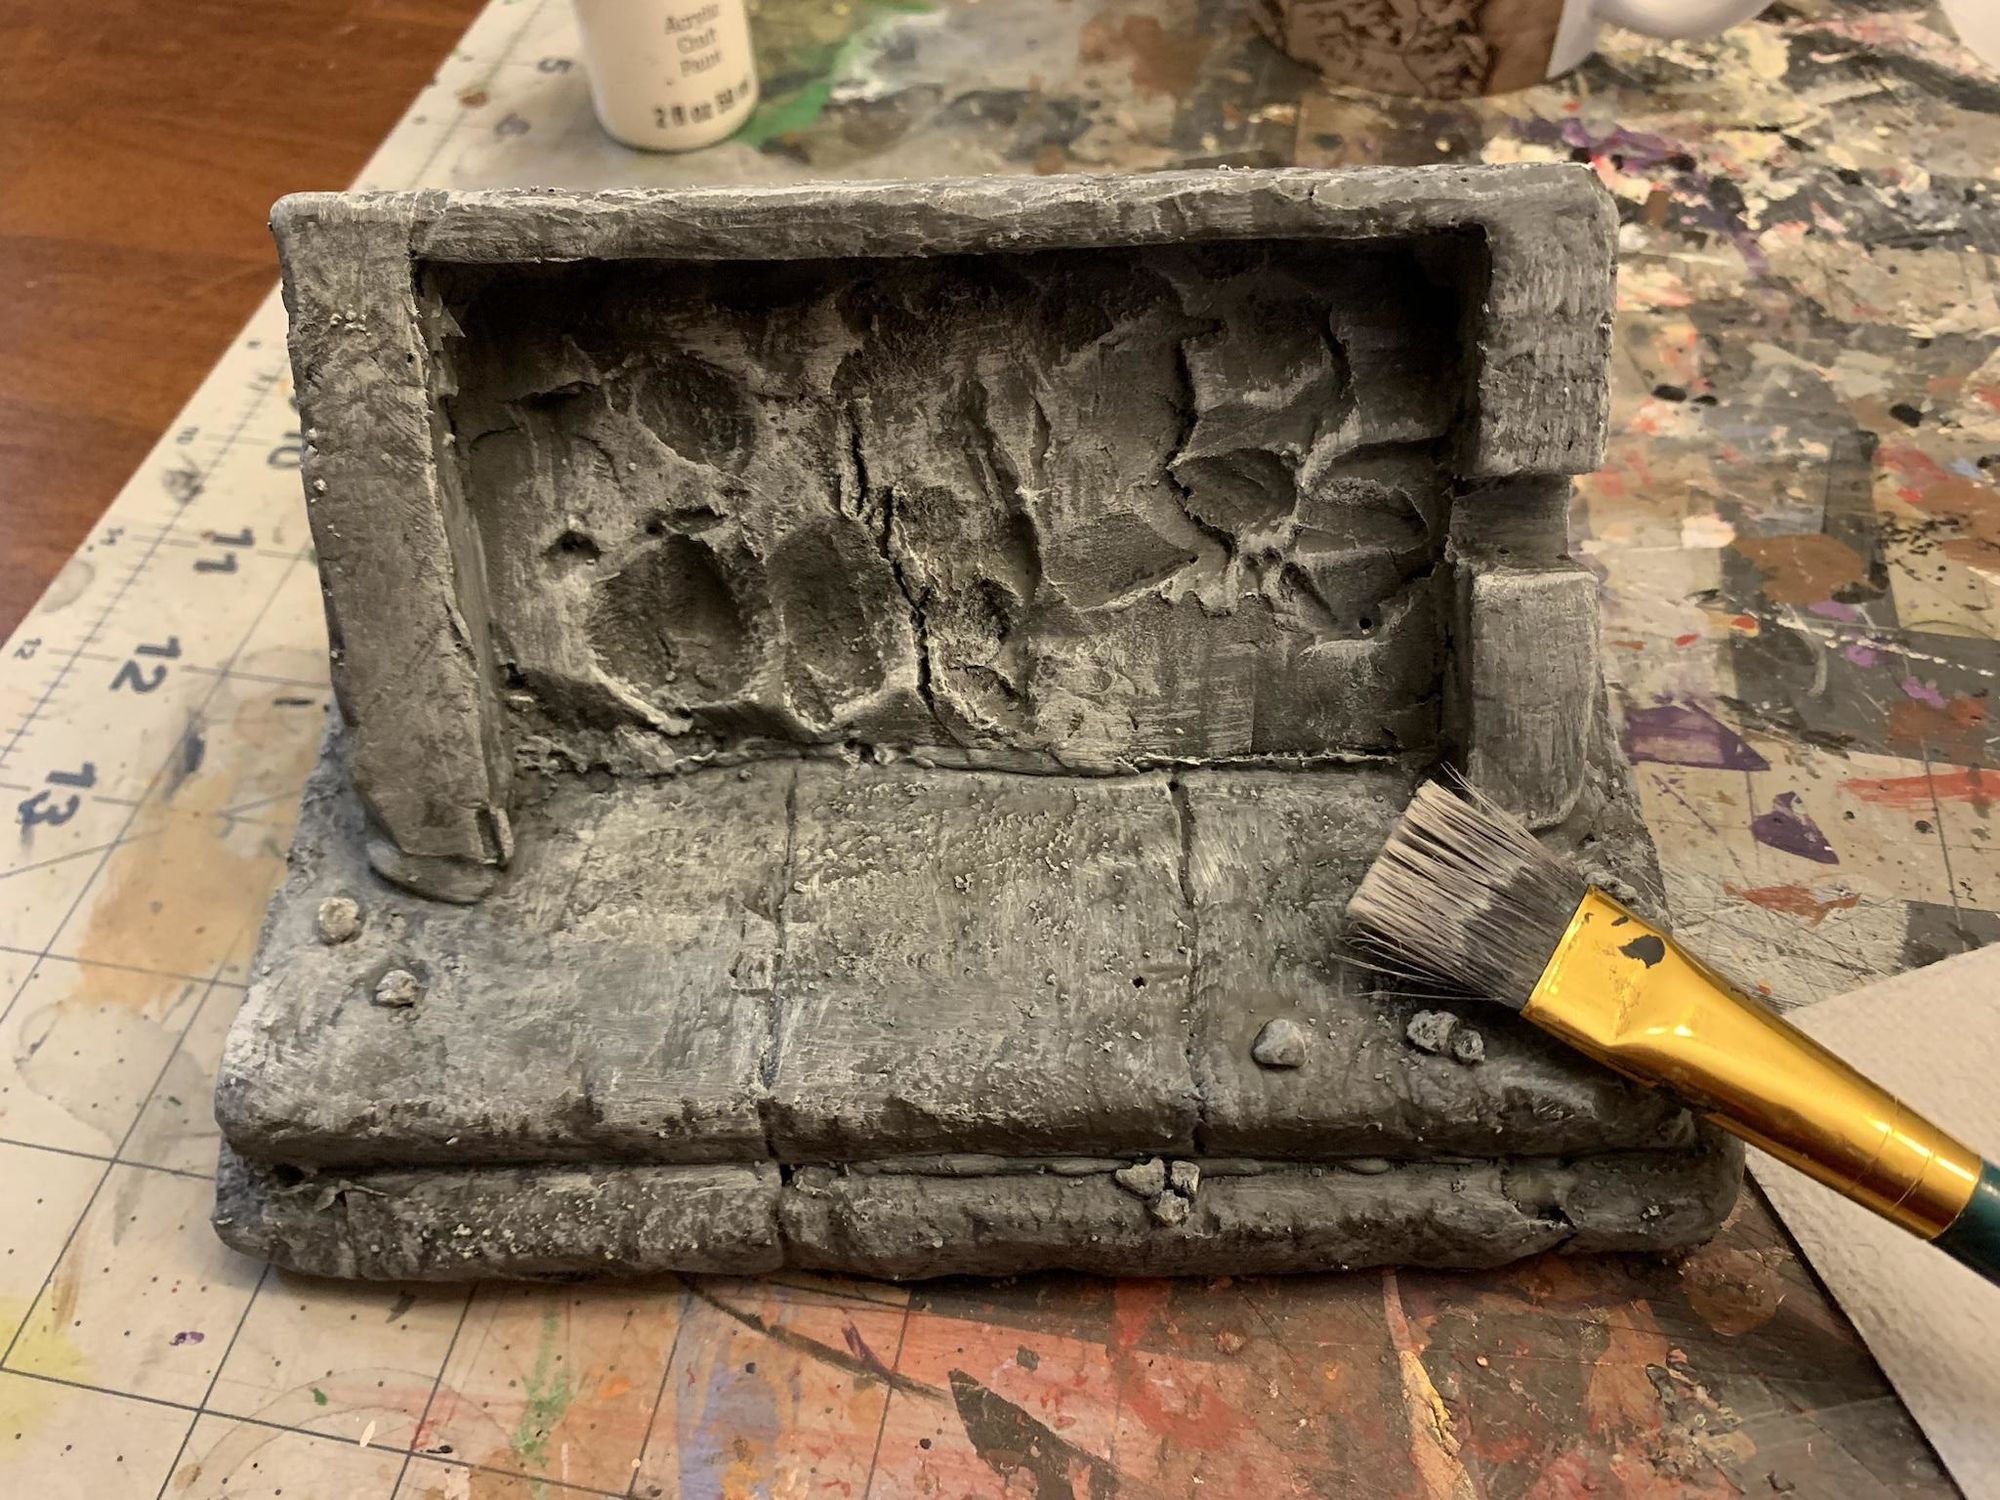
Using the original cardboard stand as a size reference, I measured and cut a small piece of plastic to get started. Once I had that, I cut an identical-sized piece of XPS foam that I glued to the plastic sheet. I used a hobby knife to round the edges (in the fashion of smoothed stone) and then started cutting smaller chunks that I hot glued to the edges to create a border of sorts.
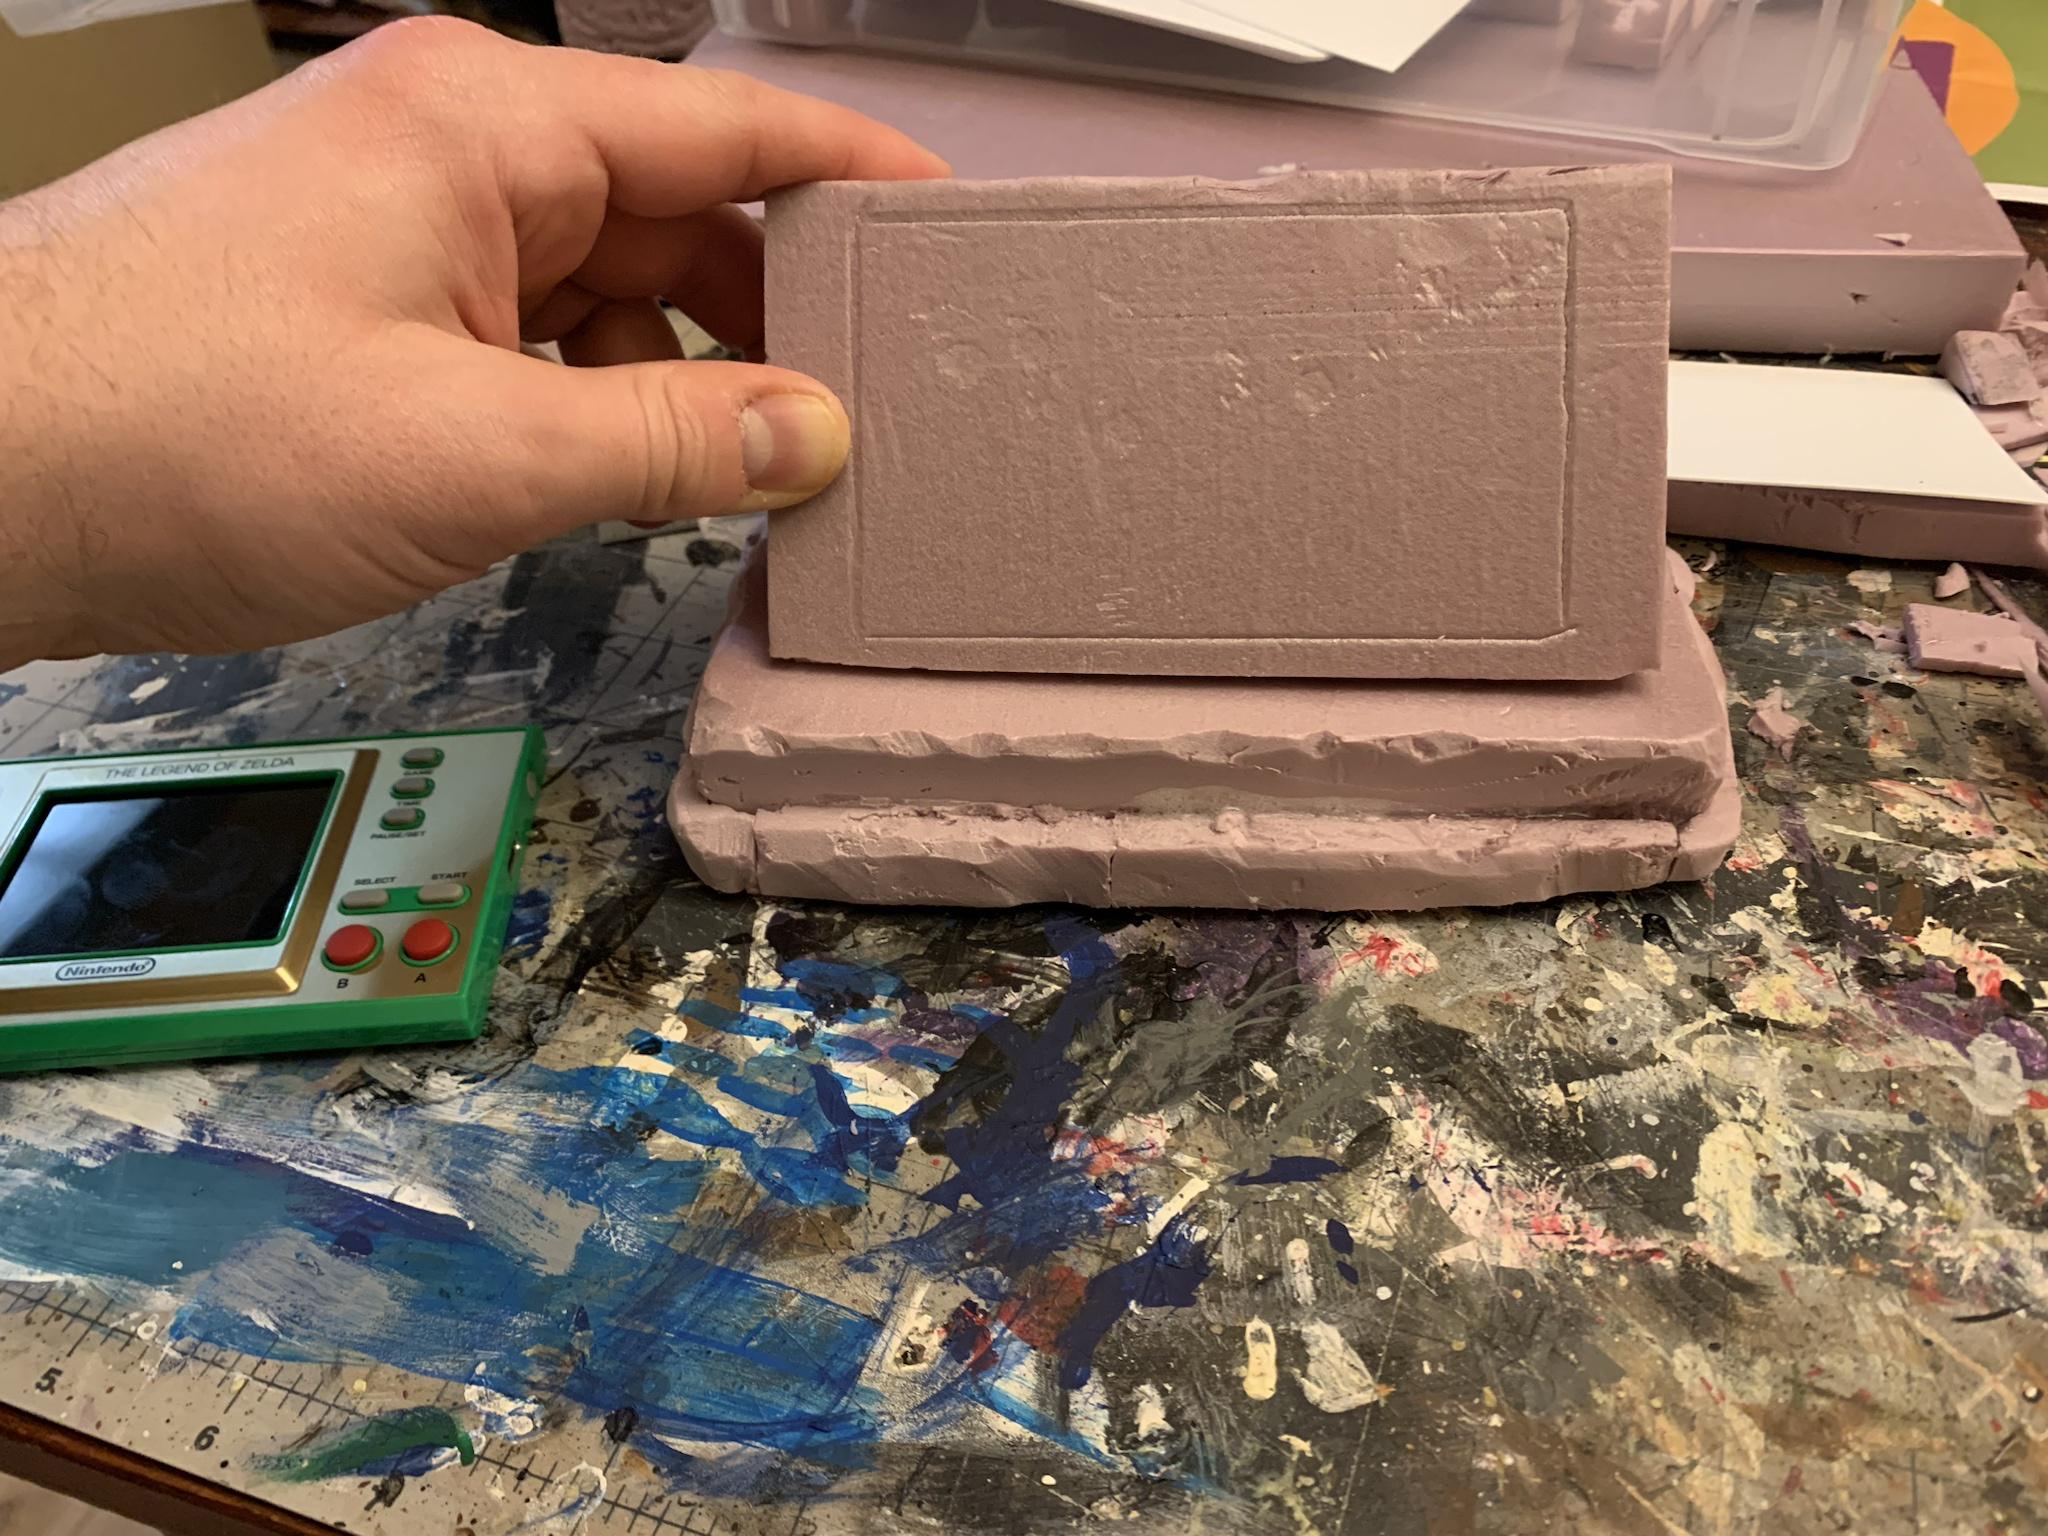
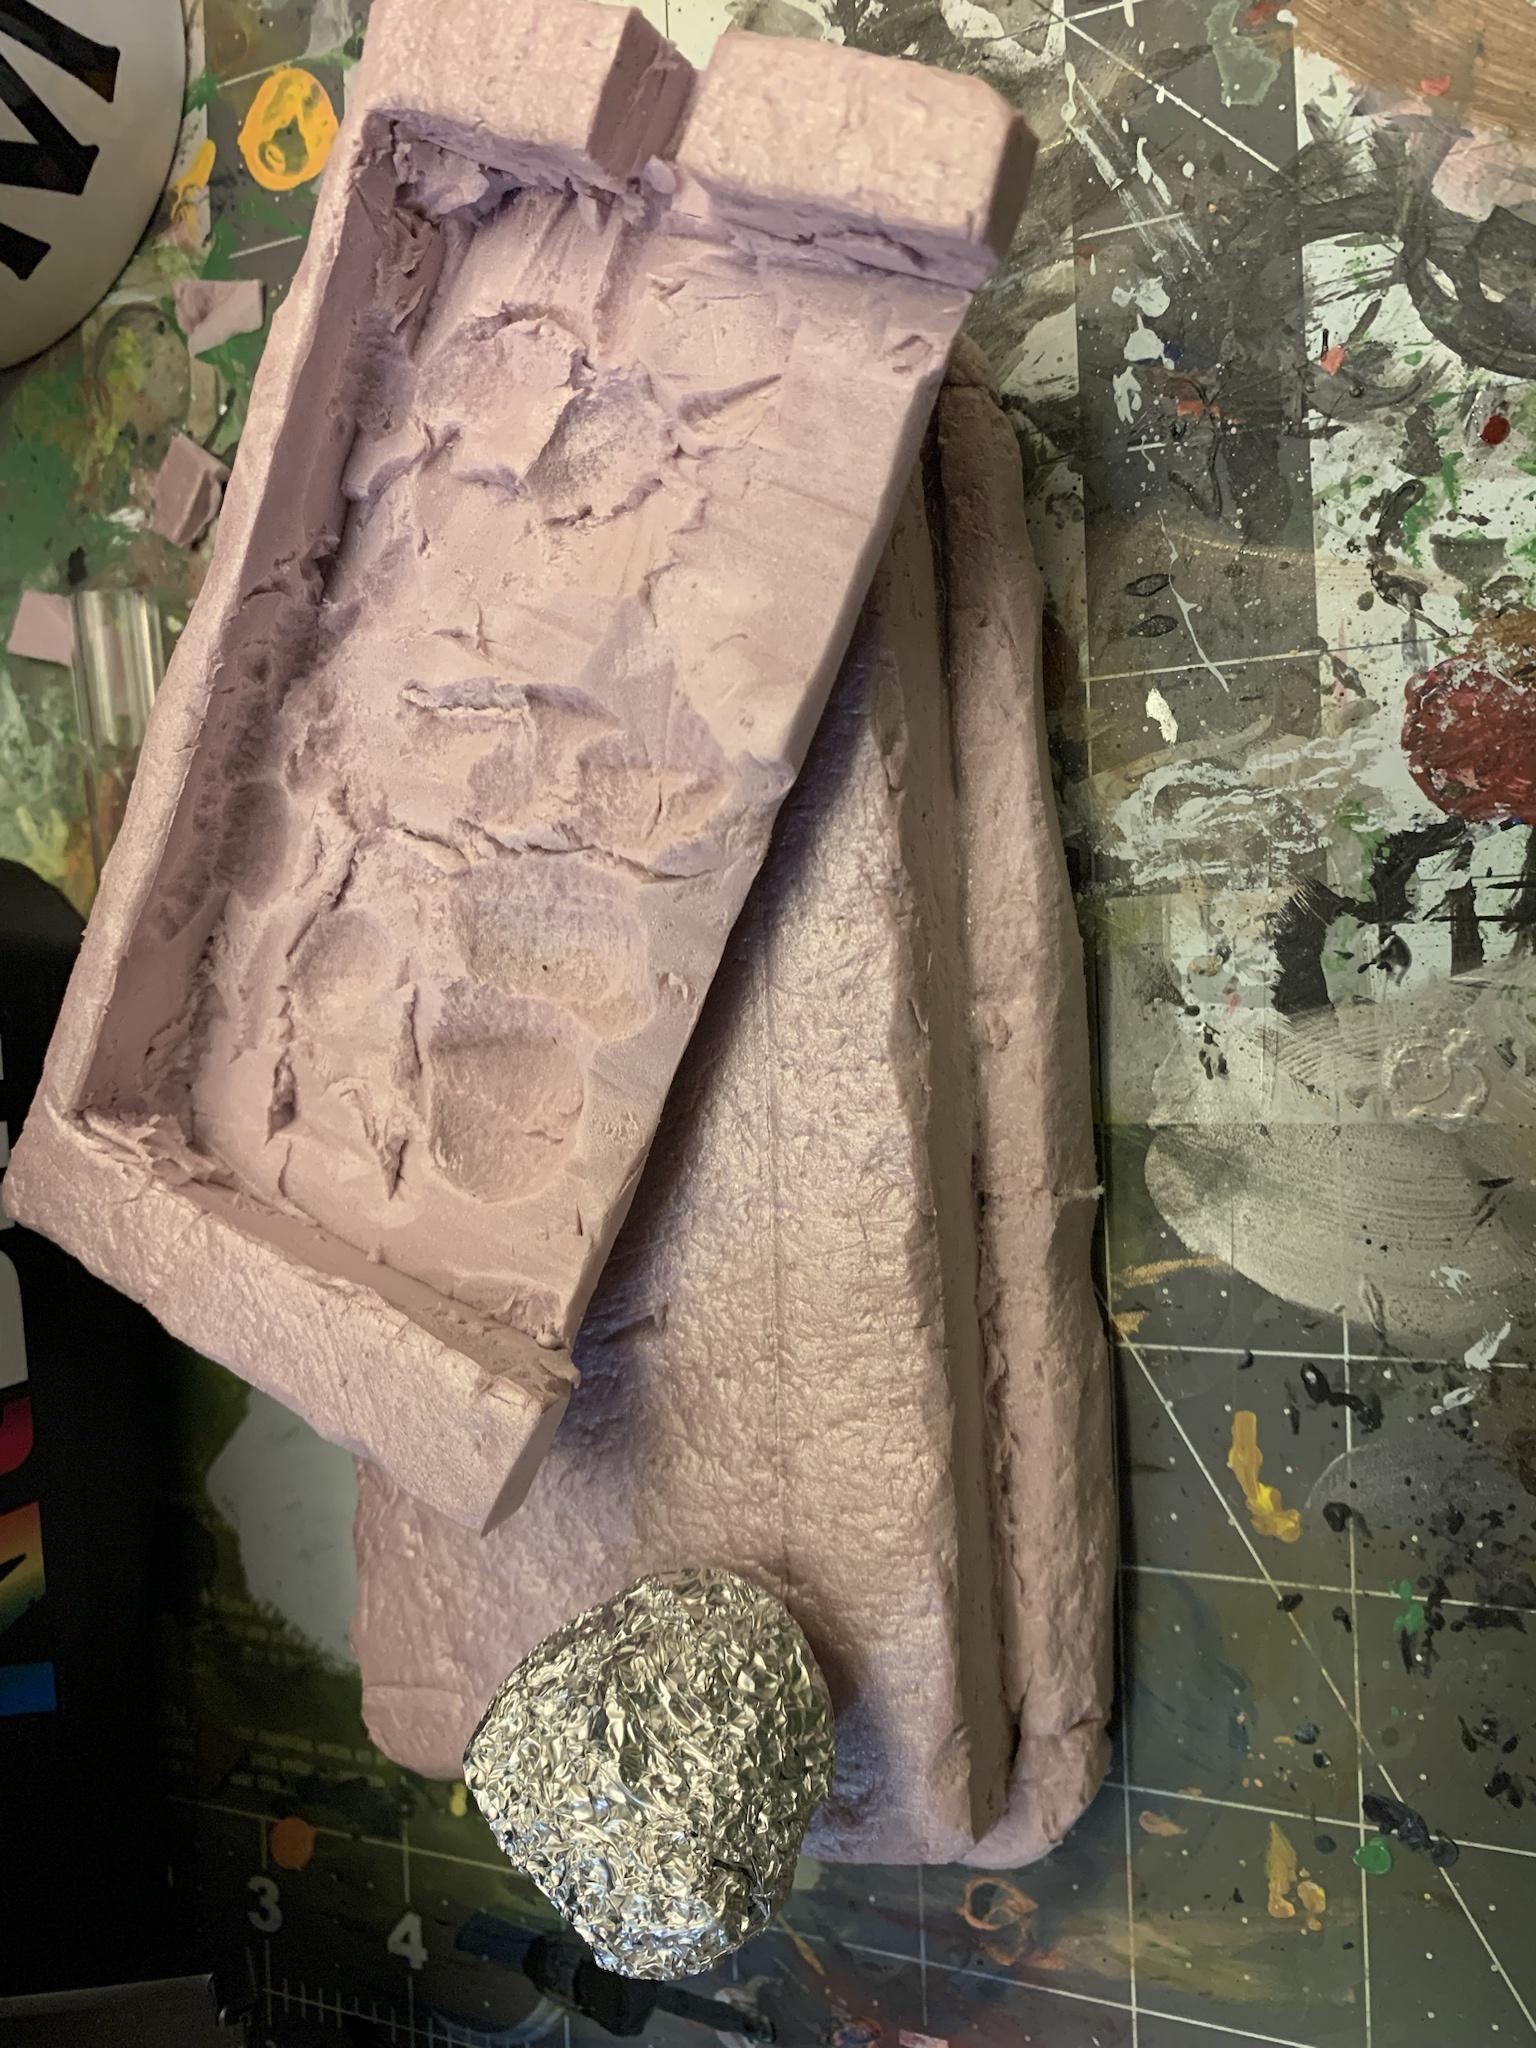
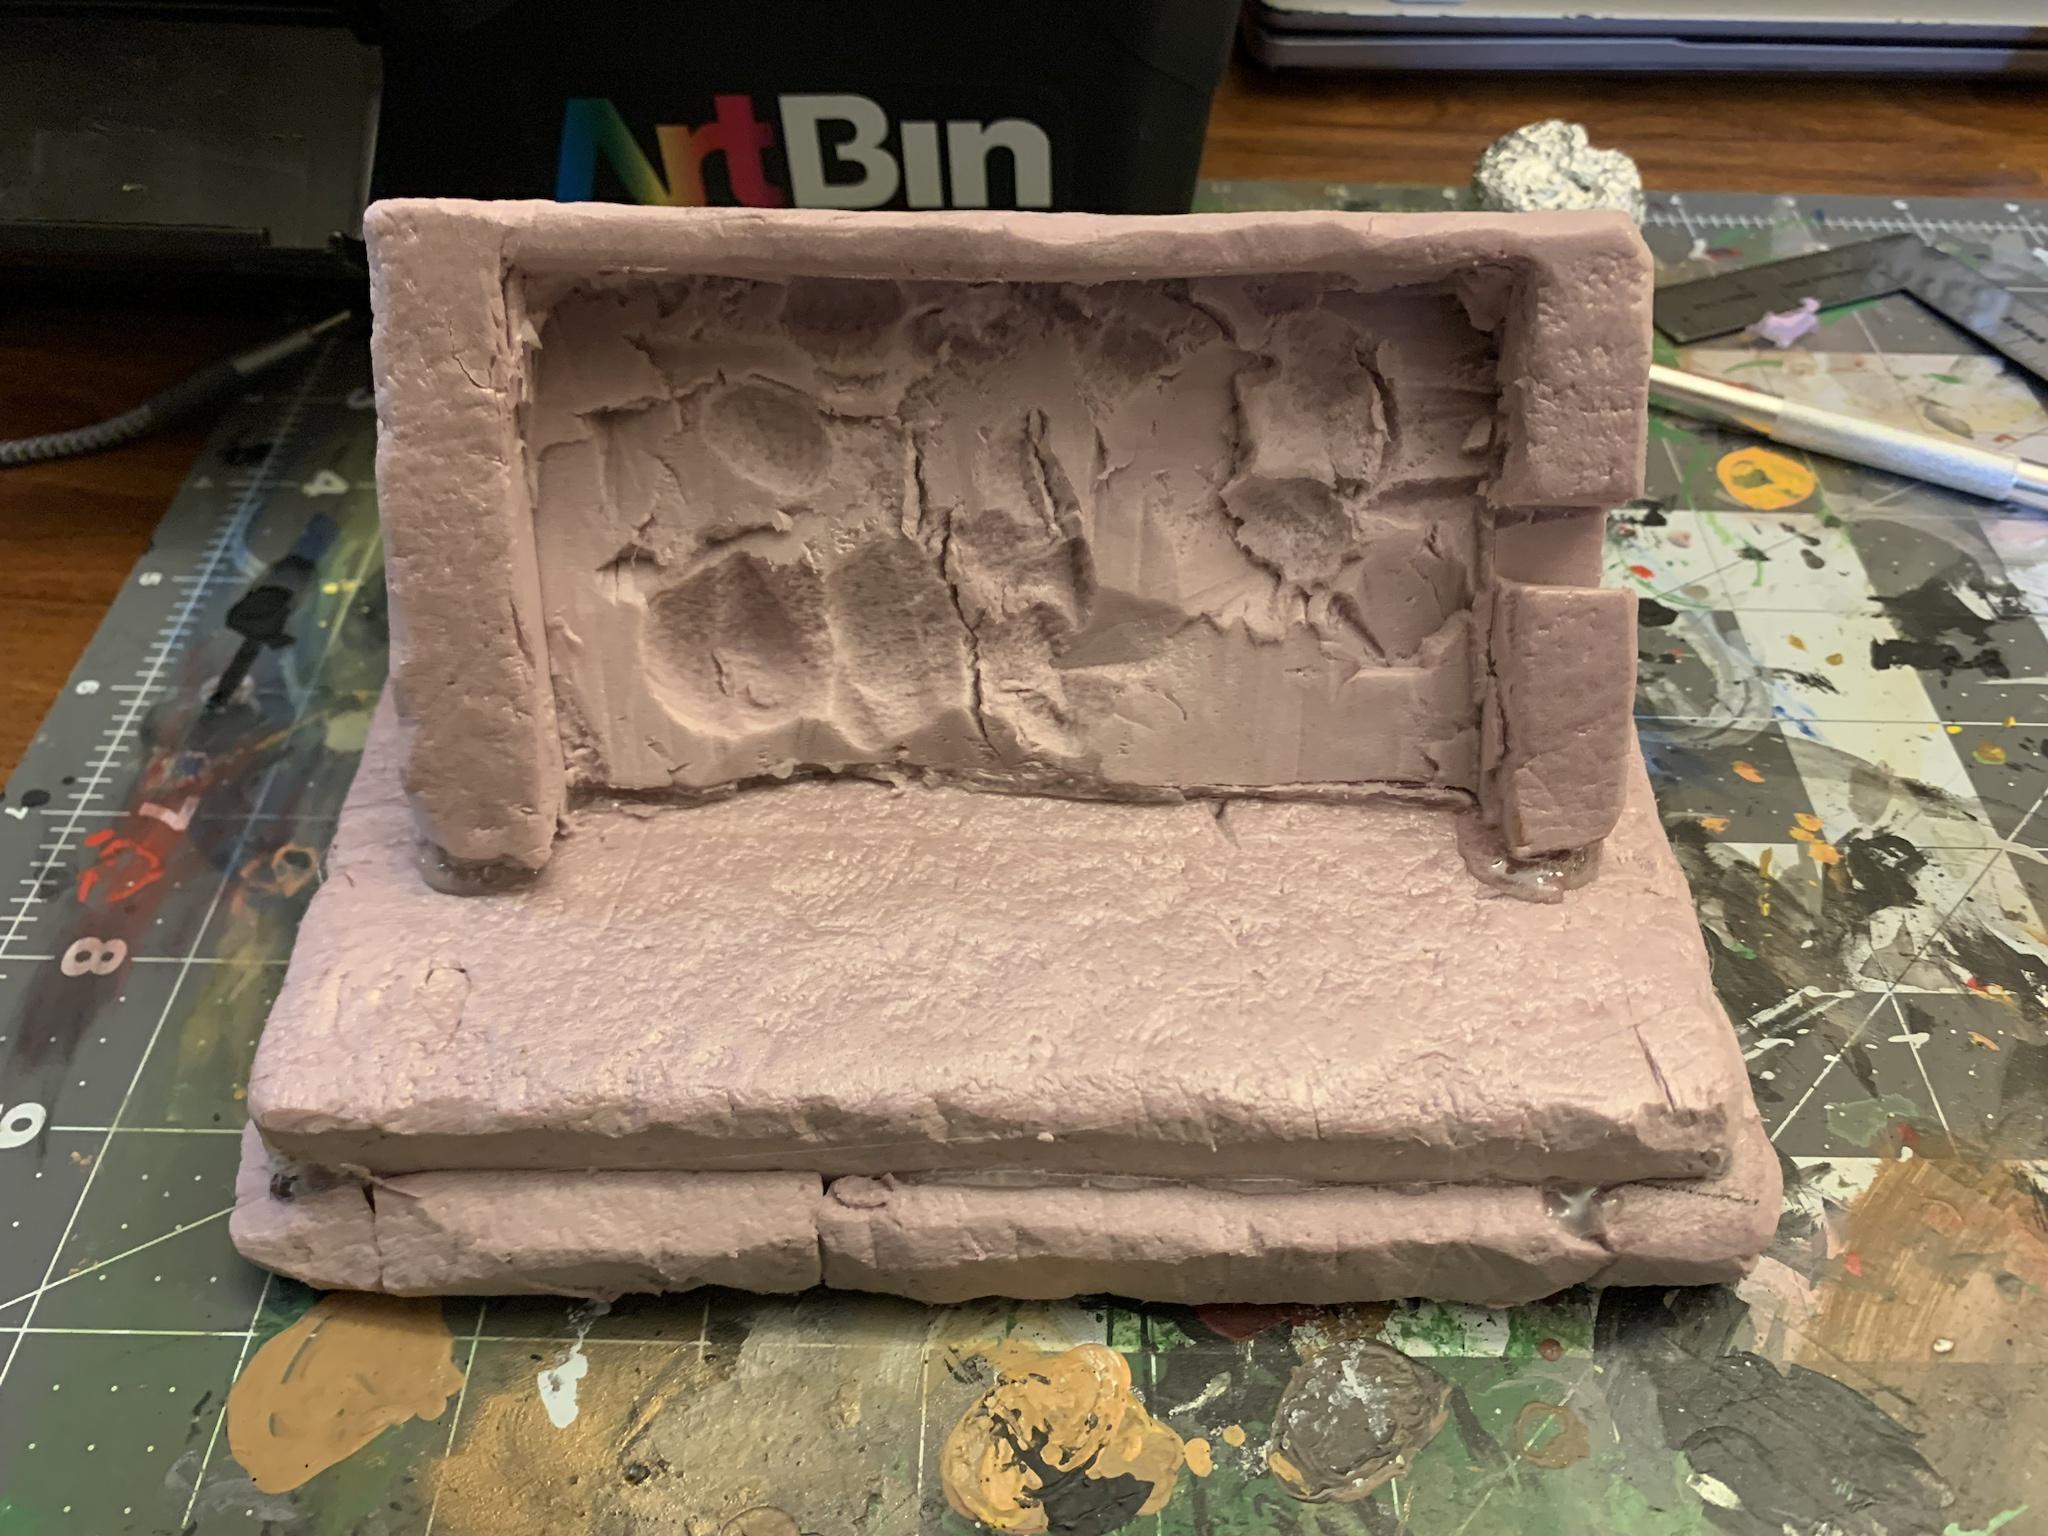
After I finished the initial gluing, I went back through with my knife to make some intentional knicks and notches. I also rolled a wadded-up ball of aluminum foil over the entirety of the clock stand's surface. This is an easy way to give the XPS foam a more natural stone-like texture.
To round out this part of the project, I cut out another large slab of XPS foam to house the Game & Watch clock itself. I wanted this to rest at a tilt, so I cut off one of its sides at an angle. I used my knife and a spoon to slice and scoop out chunks of foam, creating a cavity for the handheld to rest in.
With all of this done... it honestly didn't look like much. The next steps would be all about making it pretty.
Step 2: Pink Begone!
With the stand ostensibly assembled, the next step was to start covering things up. While I'm not opposed to pink as a rule, the XPS foam's natural coloring didn't really scream "epic fantasy."
The first step of Step 2! was to lay down a darker base coat. When working with foam, my preferred base coat is a mixture of Modge Podge and black acrylic paint. This is a method I first learned from Black Magic Craft - one of the best and most prominent crafting channels on YouTube. The mixture does the double duty of firming up the foam a bit while also laying down a nice layer of black.
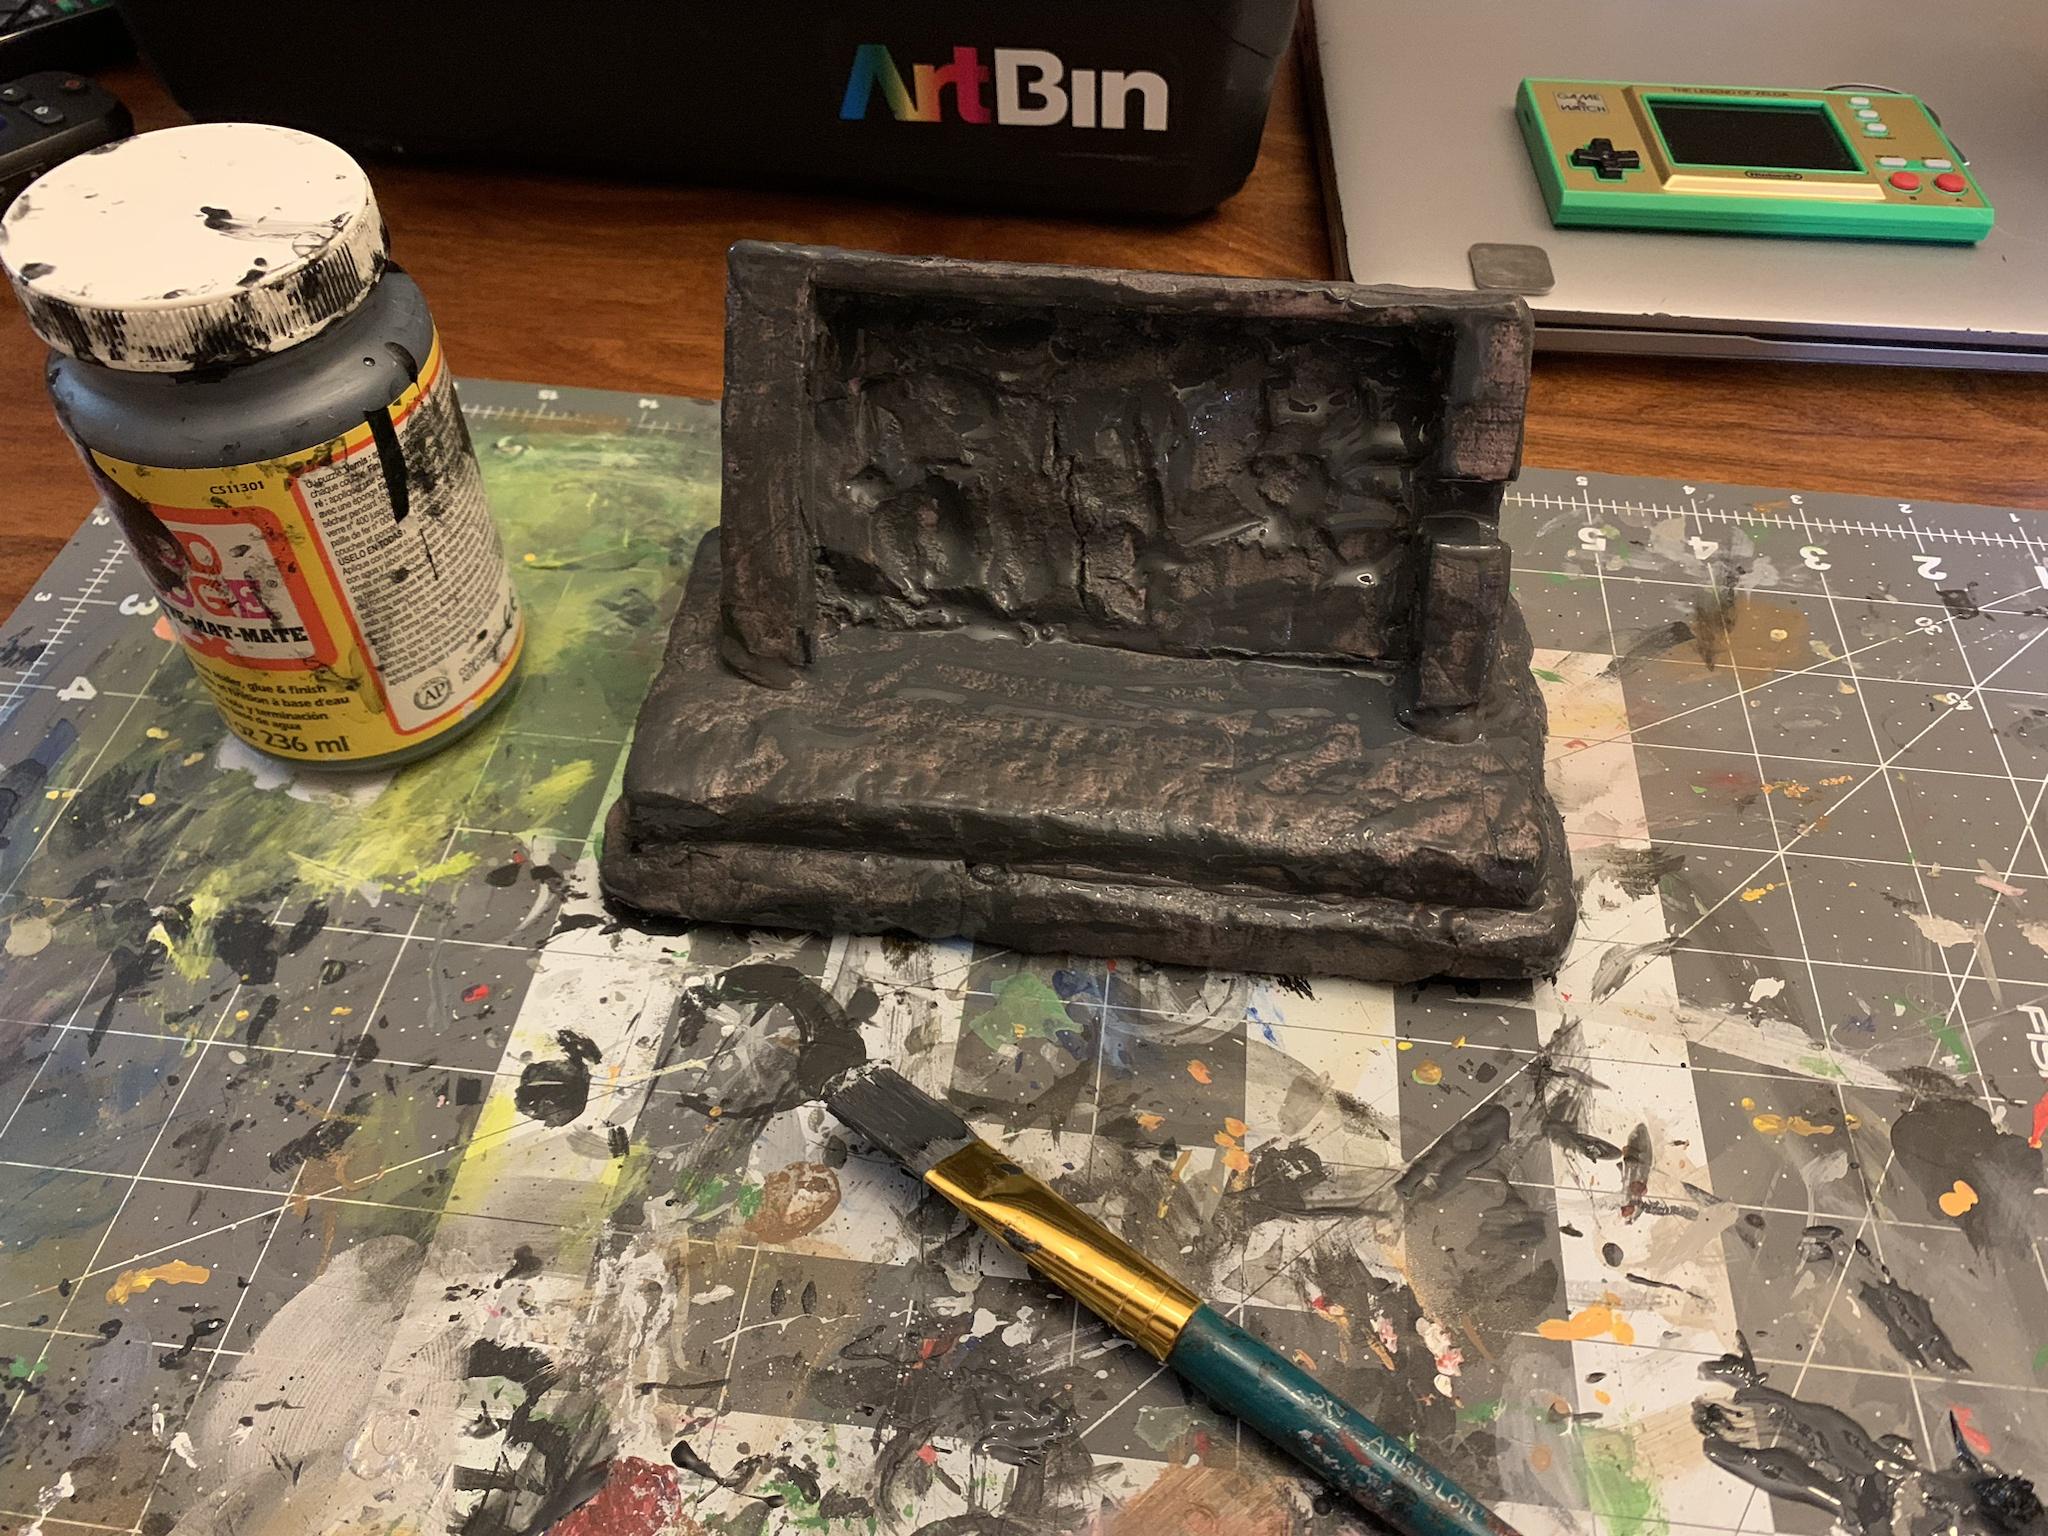
Modge Podge takes time to dry, so putting on the base coat wound up being an overnight affair. When I returned to the project the next day, I applied a second coat of dark gray acrylic paint. I put the paint on fairly thick and in several layers, so it took a few hours for it to dry afterward. I then glued on a few little stones for detail. Once everything was ready, I was able to move on to one of the most essential parts of a miniatures project of this sort: washing.
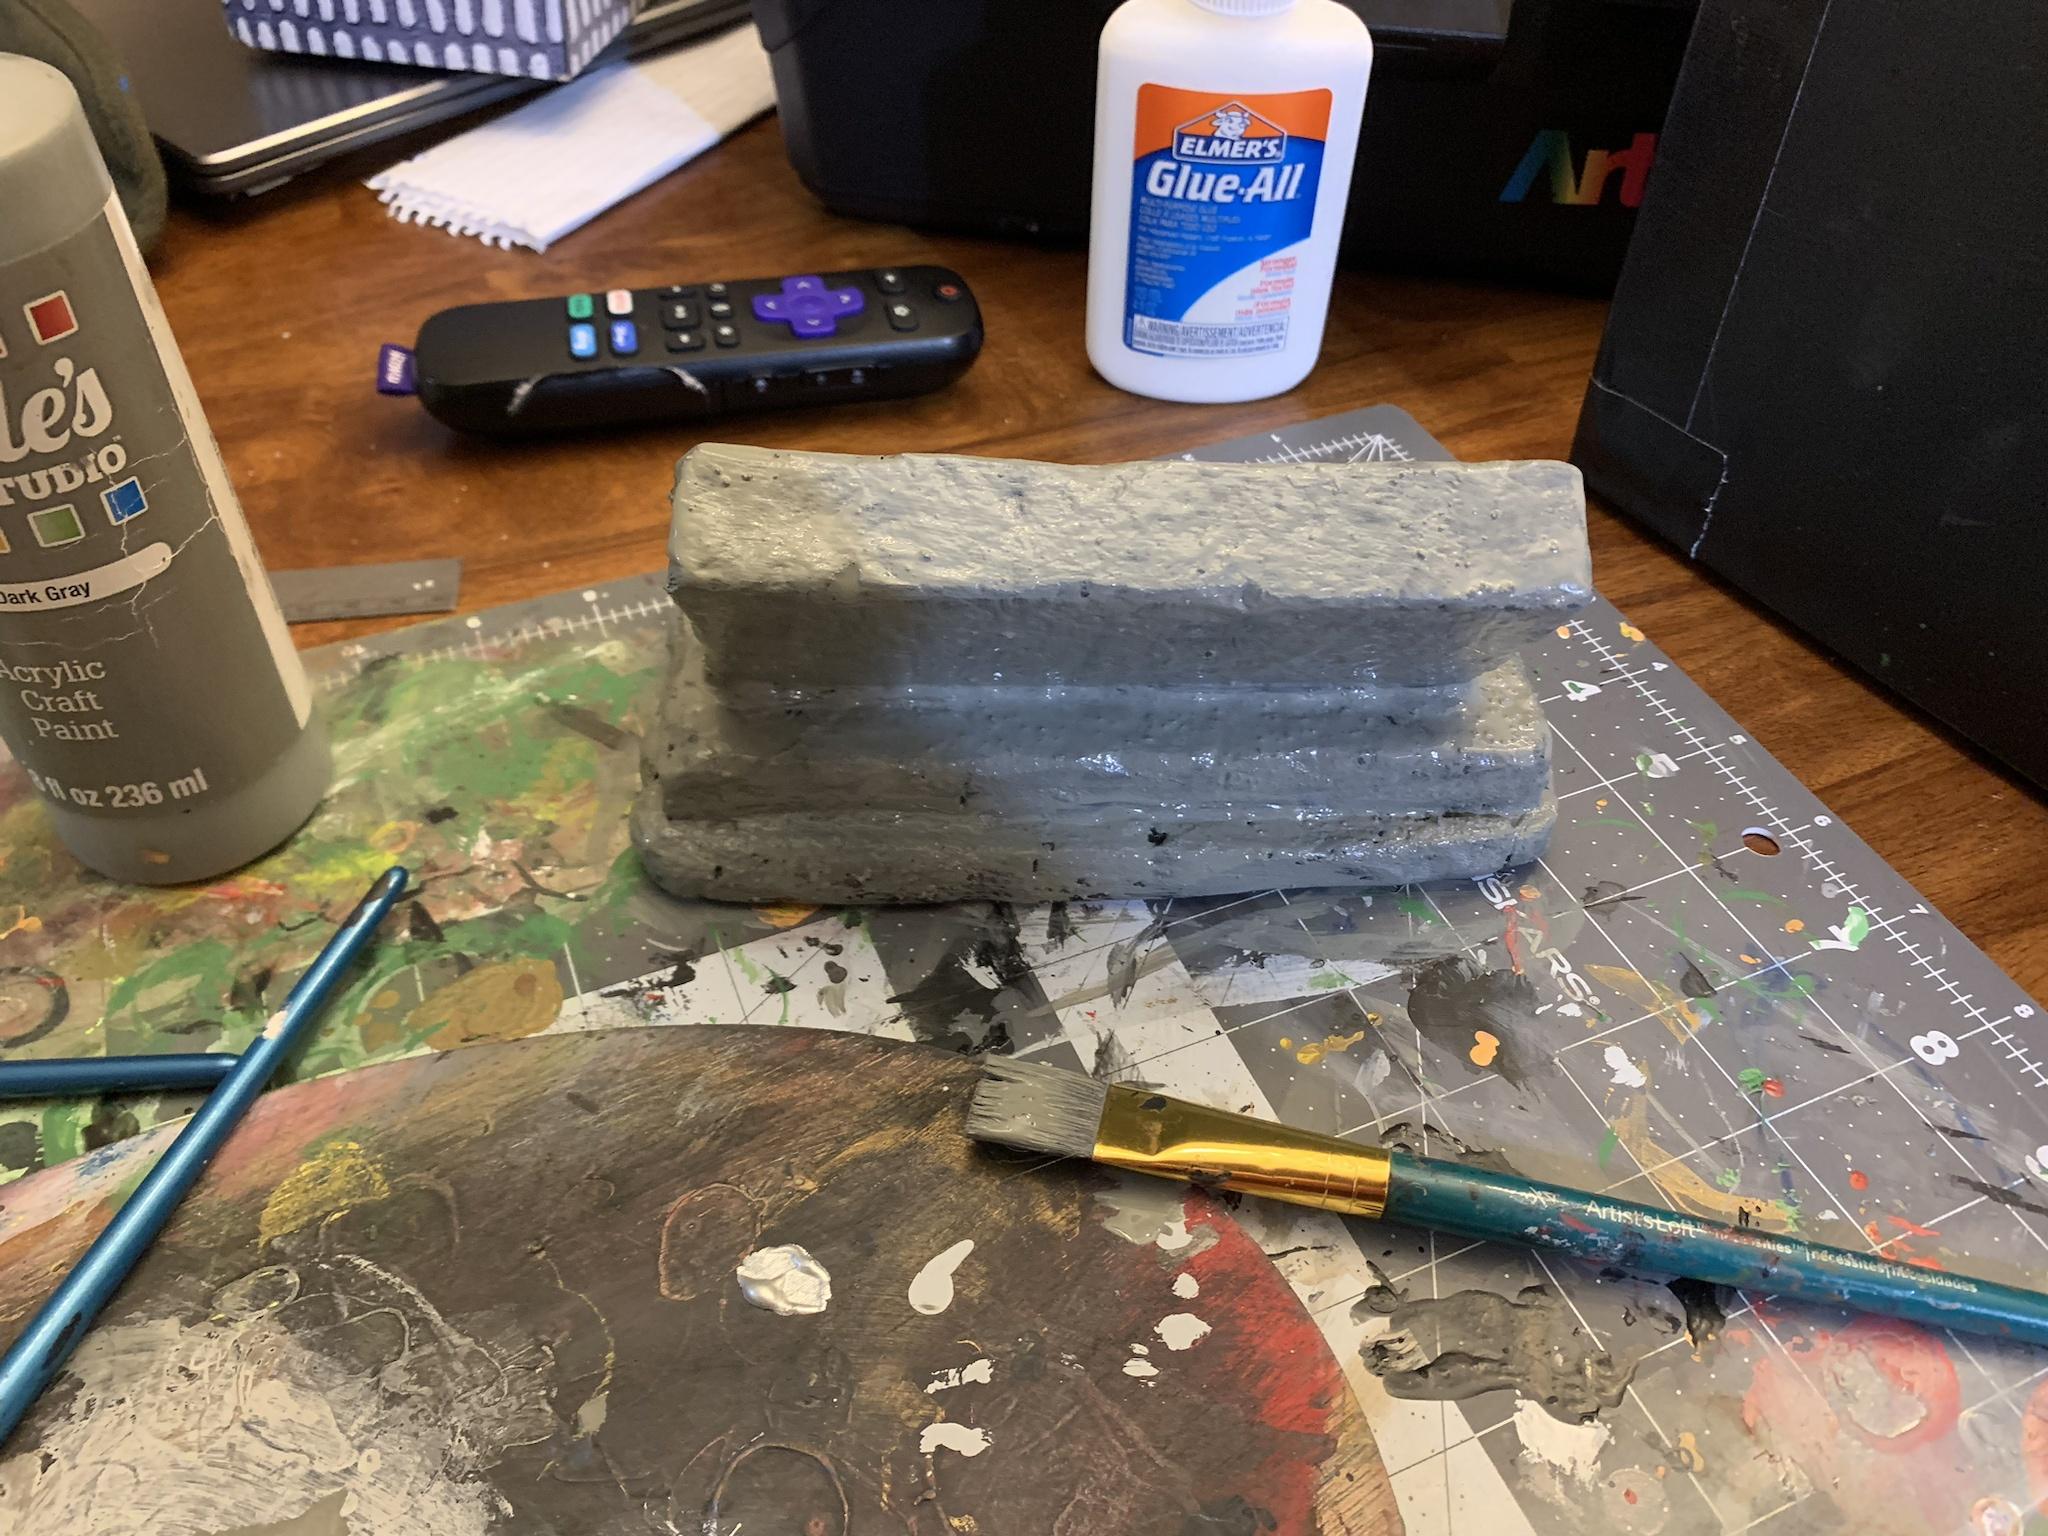
Step 3: Blackwash
Once the initial coats of paint had dried, it was time to tackle the washing step. A "wash" is basically a dyed liquid you pour over a project to add hints of color you would struggle to achieve with paint. Because the wash liquid is thinner, it naturally flows into spaces and contours that would be almost impossible to reach otherwise. A good wash can make a huge difference in the quality of a paint job. Some crafters go so far as to refer to it as "talent in a bottle."

Usually, when I'm working with smaller individual miniatures, I rely on a professionally made wash that I can apply by brush. When I'm working with larger terrain pieces, however, I use a homemade mixture of water and black ink. It's more cost-effective and I can store larger batches inside handy sprayers that make application easier.
That's the route I went with my clock stand. I moved the project into the sink to avoid a mess and then sprayed every inch of it with my homemade wash. I then left it overnight again to dry. (A lot of crafting is patience!)
Step 4: Dry Brushing
The blackwash step tends to be the one that makes me most nervous, if only because it's the one I most frequently overdo. I have come back more than a few mornings to discover an inky black mess that I then need to repaint almost entirely. Luckily, I hit the "just right" mark with this one and was able to move on to what is probably my favorite step, overall.
Dry brushing involves just applying small amounts of paint by brush. So small, in fact, that the paint is practically already dry. You do this by dipping your brush in the color you want and then wiping the vast majority of it off onto a paper towel (or whatever). Once it looks like the brush is empty of paint, you're ready. The only paint left will apply lightly and subtly, usually only sticking to the higher, raised surfaces. This helps to create a more textured look.
I started with white. Putting down a layer of white helps the colors you use afterward to pop more, which is definitely something I wanted since I was going to be applying another shade of gray on top of the darker one I started with.
This is where I had to decide how complex I wanted this project to be. Once the gray dry brushing was done, the clock stand actually looked pretty solid. A bit simple, perhaps, but attractive and certainly a good substitute for the cardboard stand I was replacing.
In my head, however, I could visualize something... better (for lack of another word). The Zelda game series is home to dozens of unique dungeons. One of the most famous is the Forest Temple from The Legend of Zelda: Ocarina of Time. The longer I stared at my nearly finished clock stand, the more I saw opportunities to tap into the "earth and forest" aesthetic that helps make that dungeon so iconic.
I decided to do additional dry brushing, adding patches of a brown/khaki mixture and a bit of green. I added this extra color in areas that felt natural without overwhelming the grey of the stone coloring. I also added a few miniature grass tufts – sticking them in spots that felt like places where plants might poke through decaying stone in real life.
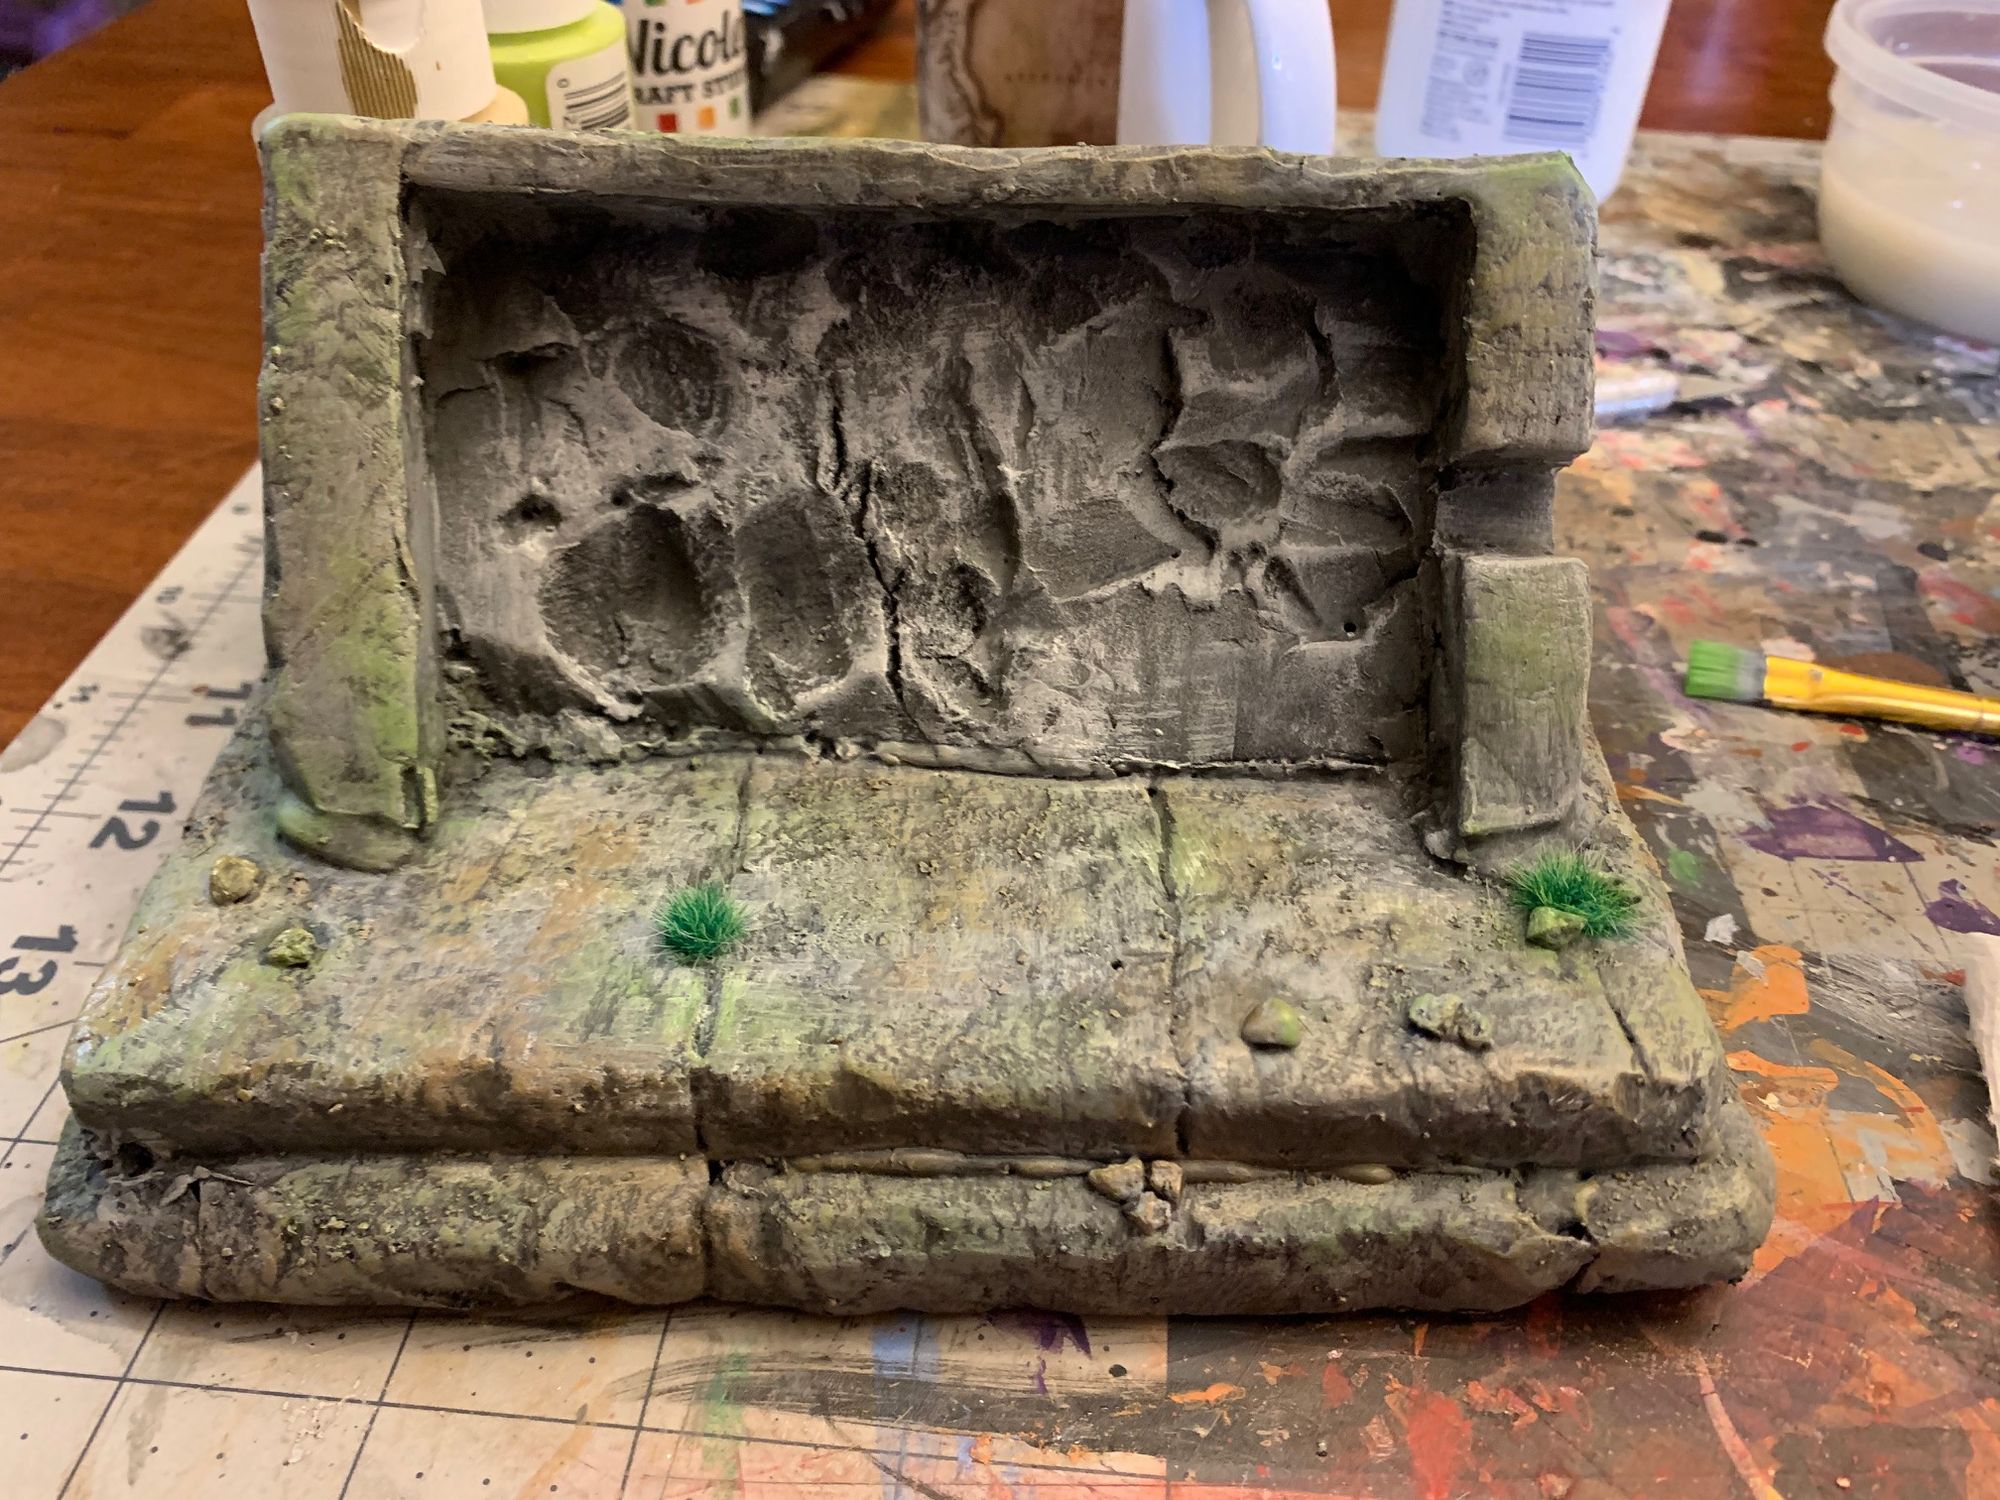
Once I felt like I had enough, I applied another layer of plain Modge Podge to seal in the paint. This had the extra added effect of giving the dried paint a bit of a sheen – a touch that worked well with the stone look I had initially been aiming for.
Step 5: The Little Things
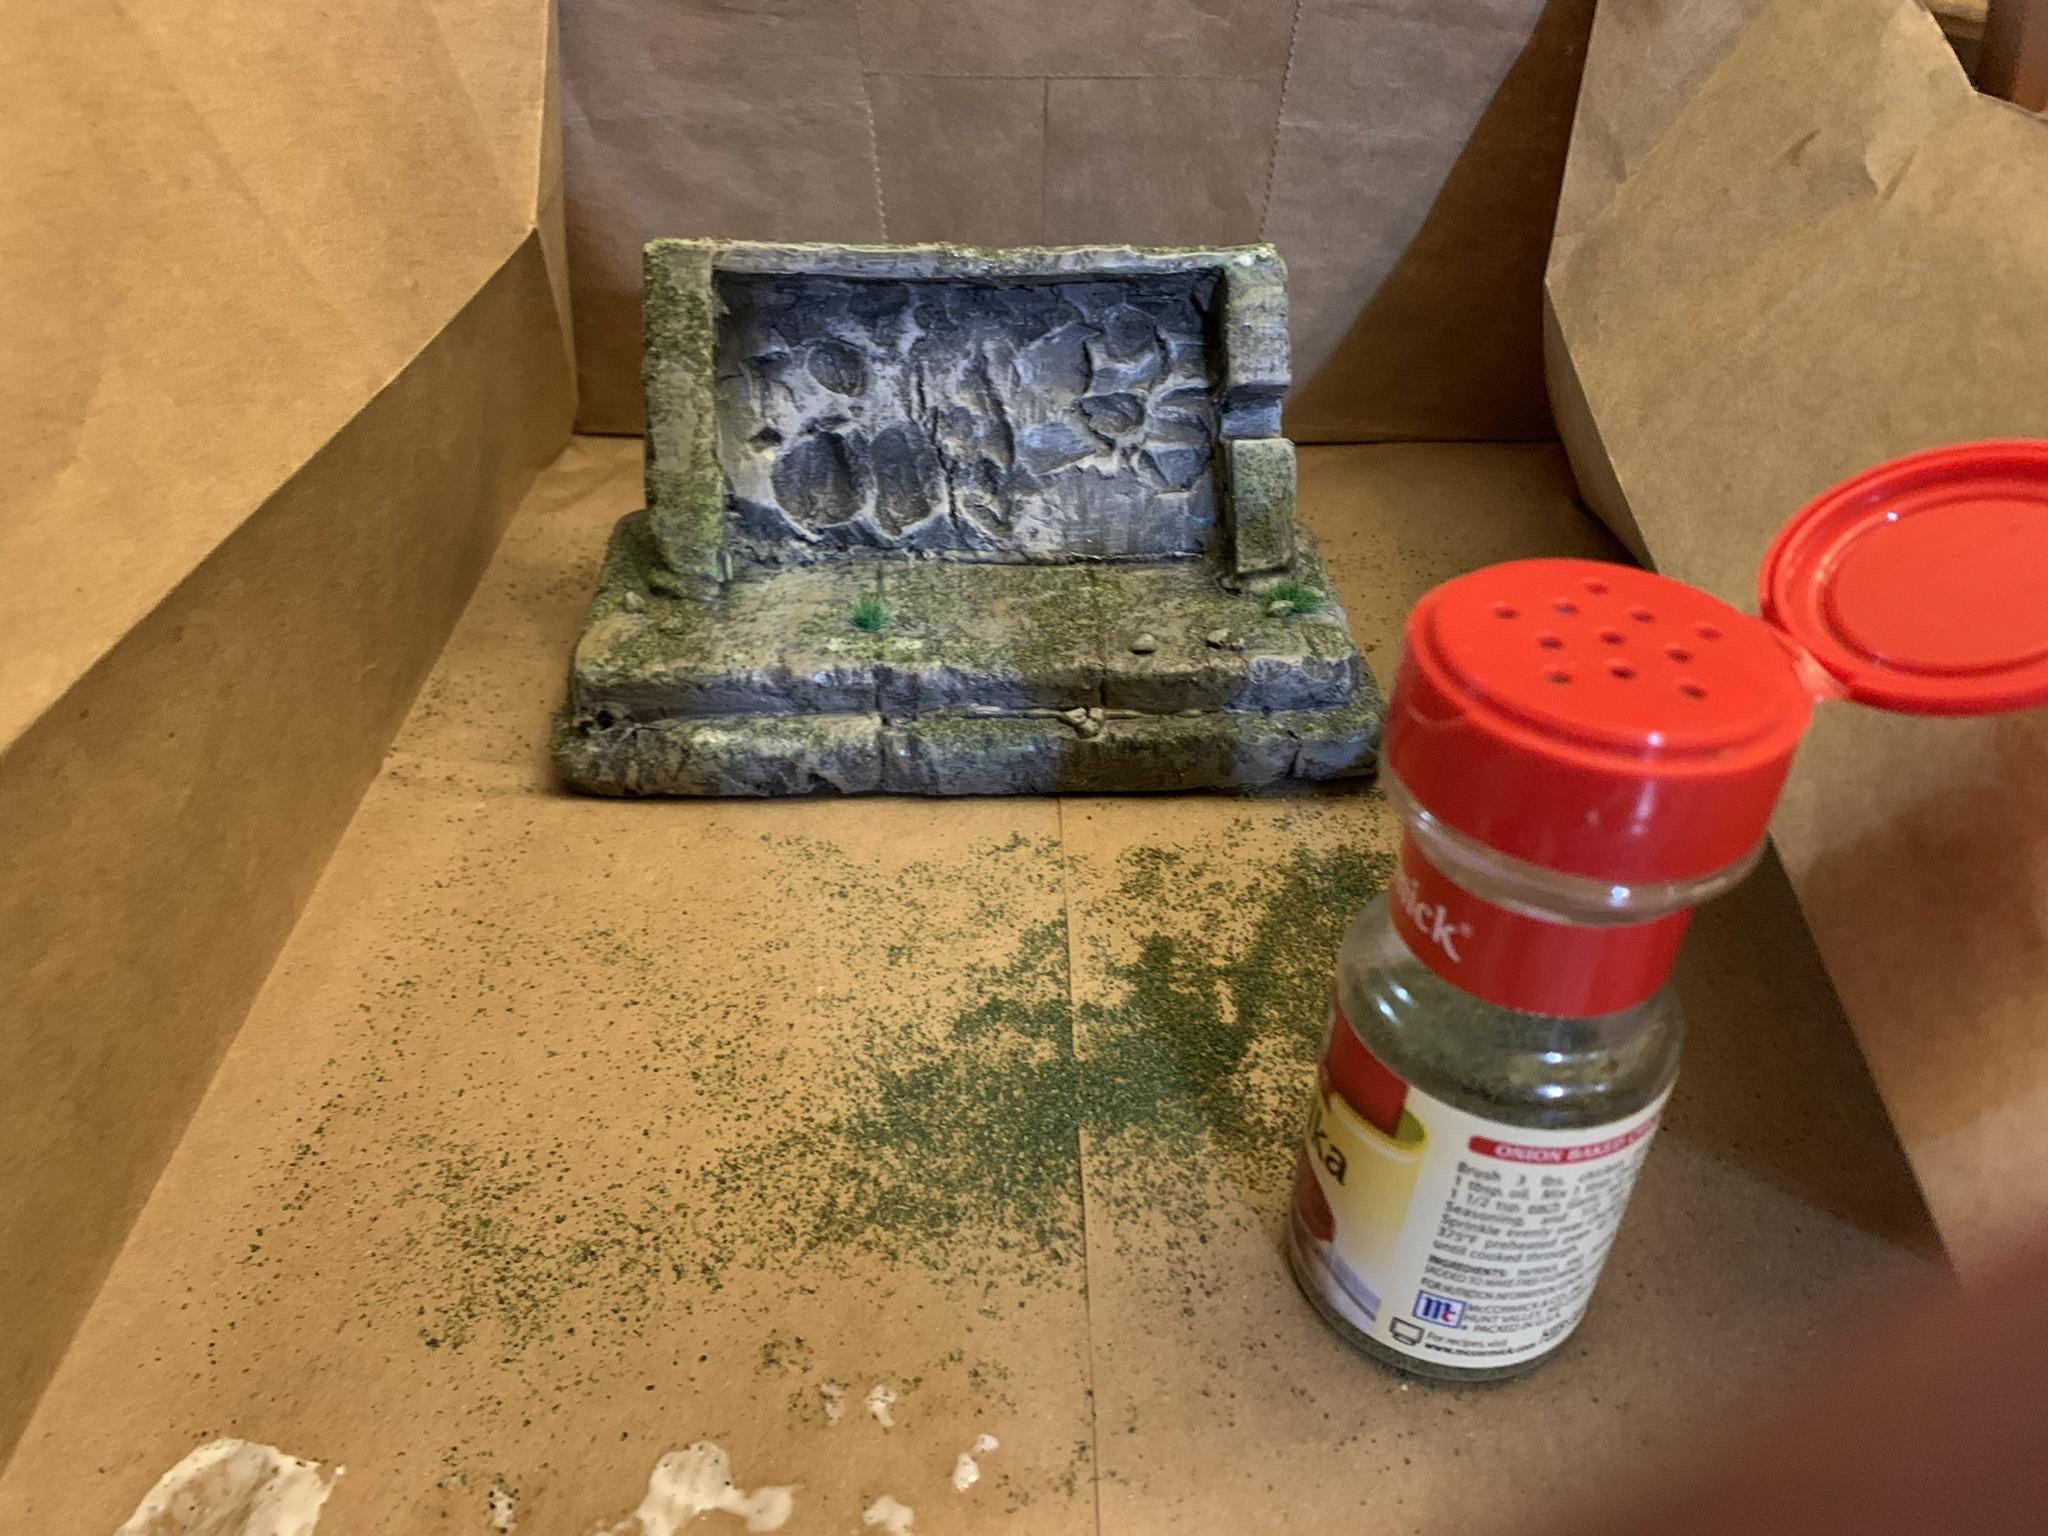
Once the last of the paint and Modge Podge had dried, I wanted to make some final touches to wrap up the project. Using the green dry brushing as a guide, I added some "flocking" (teeny tiny bits of fake grass) to help create a sort of mossy and overgrown look.
Finally, I added two small metal pieces I had been hanging onto. The first was a small metal Tri-Force (the most famous Zelda symbol!) that I had clipped off of a necklace I'd picked up on the cheap years ago. The second was a miniature replica of the Master Sword (another famous Zelda icon!).
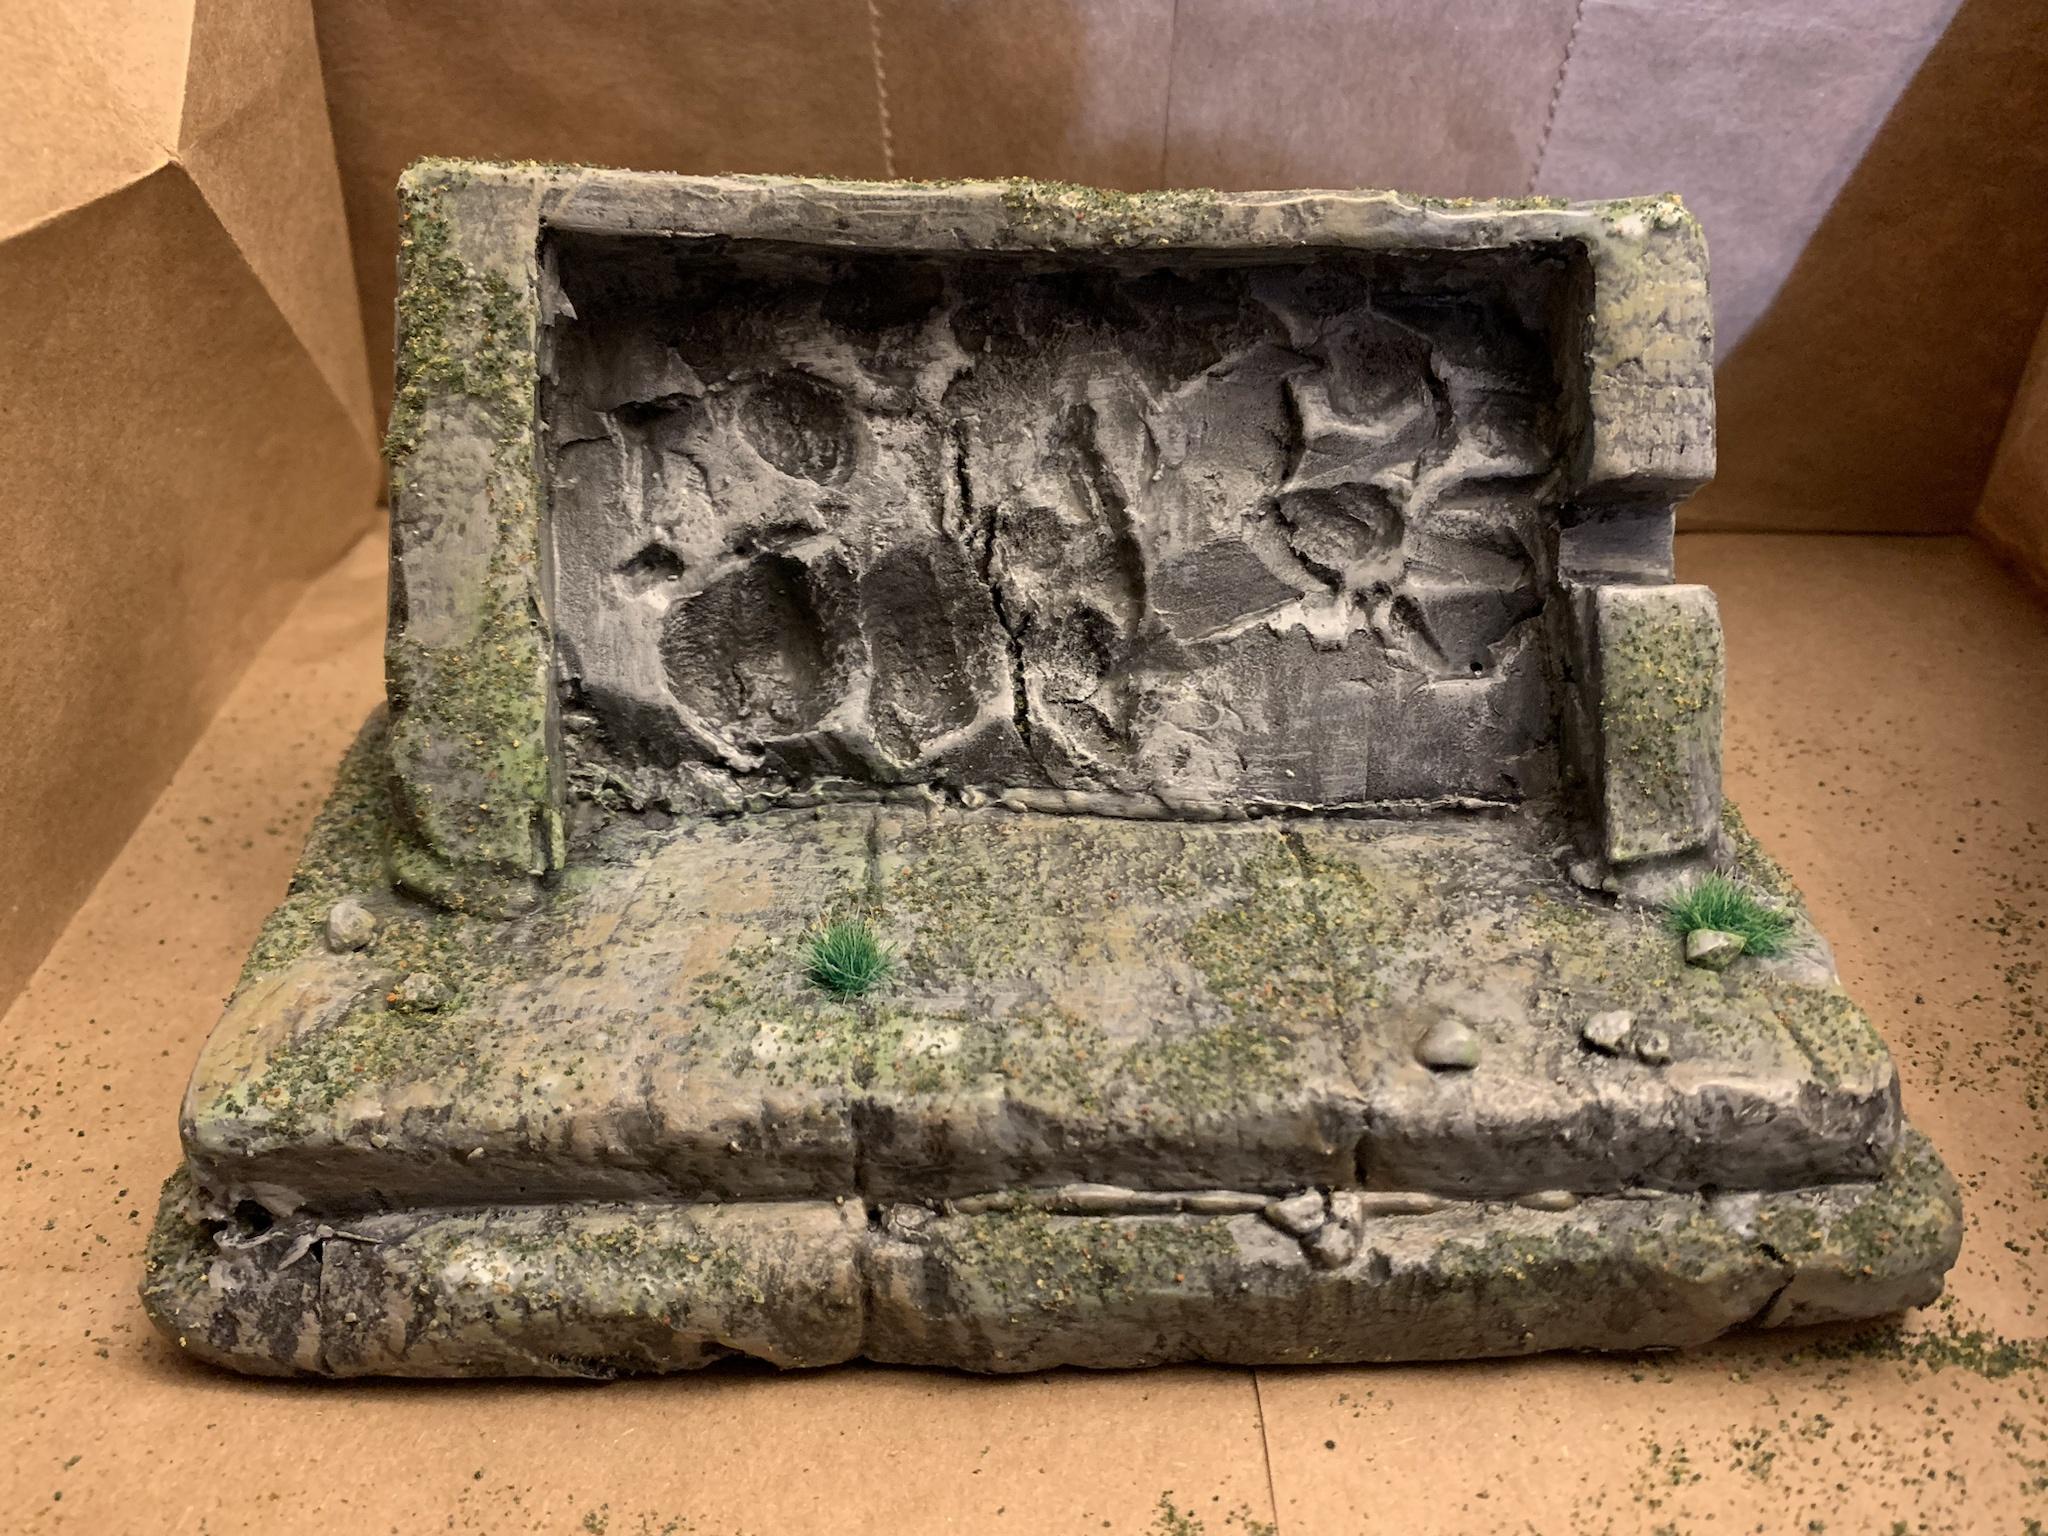
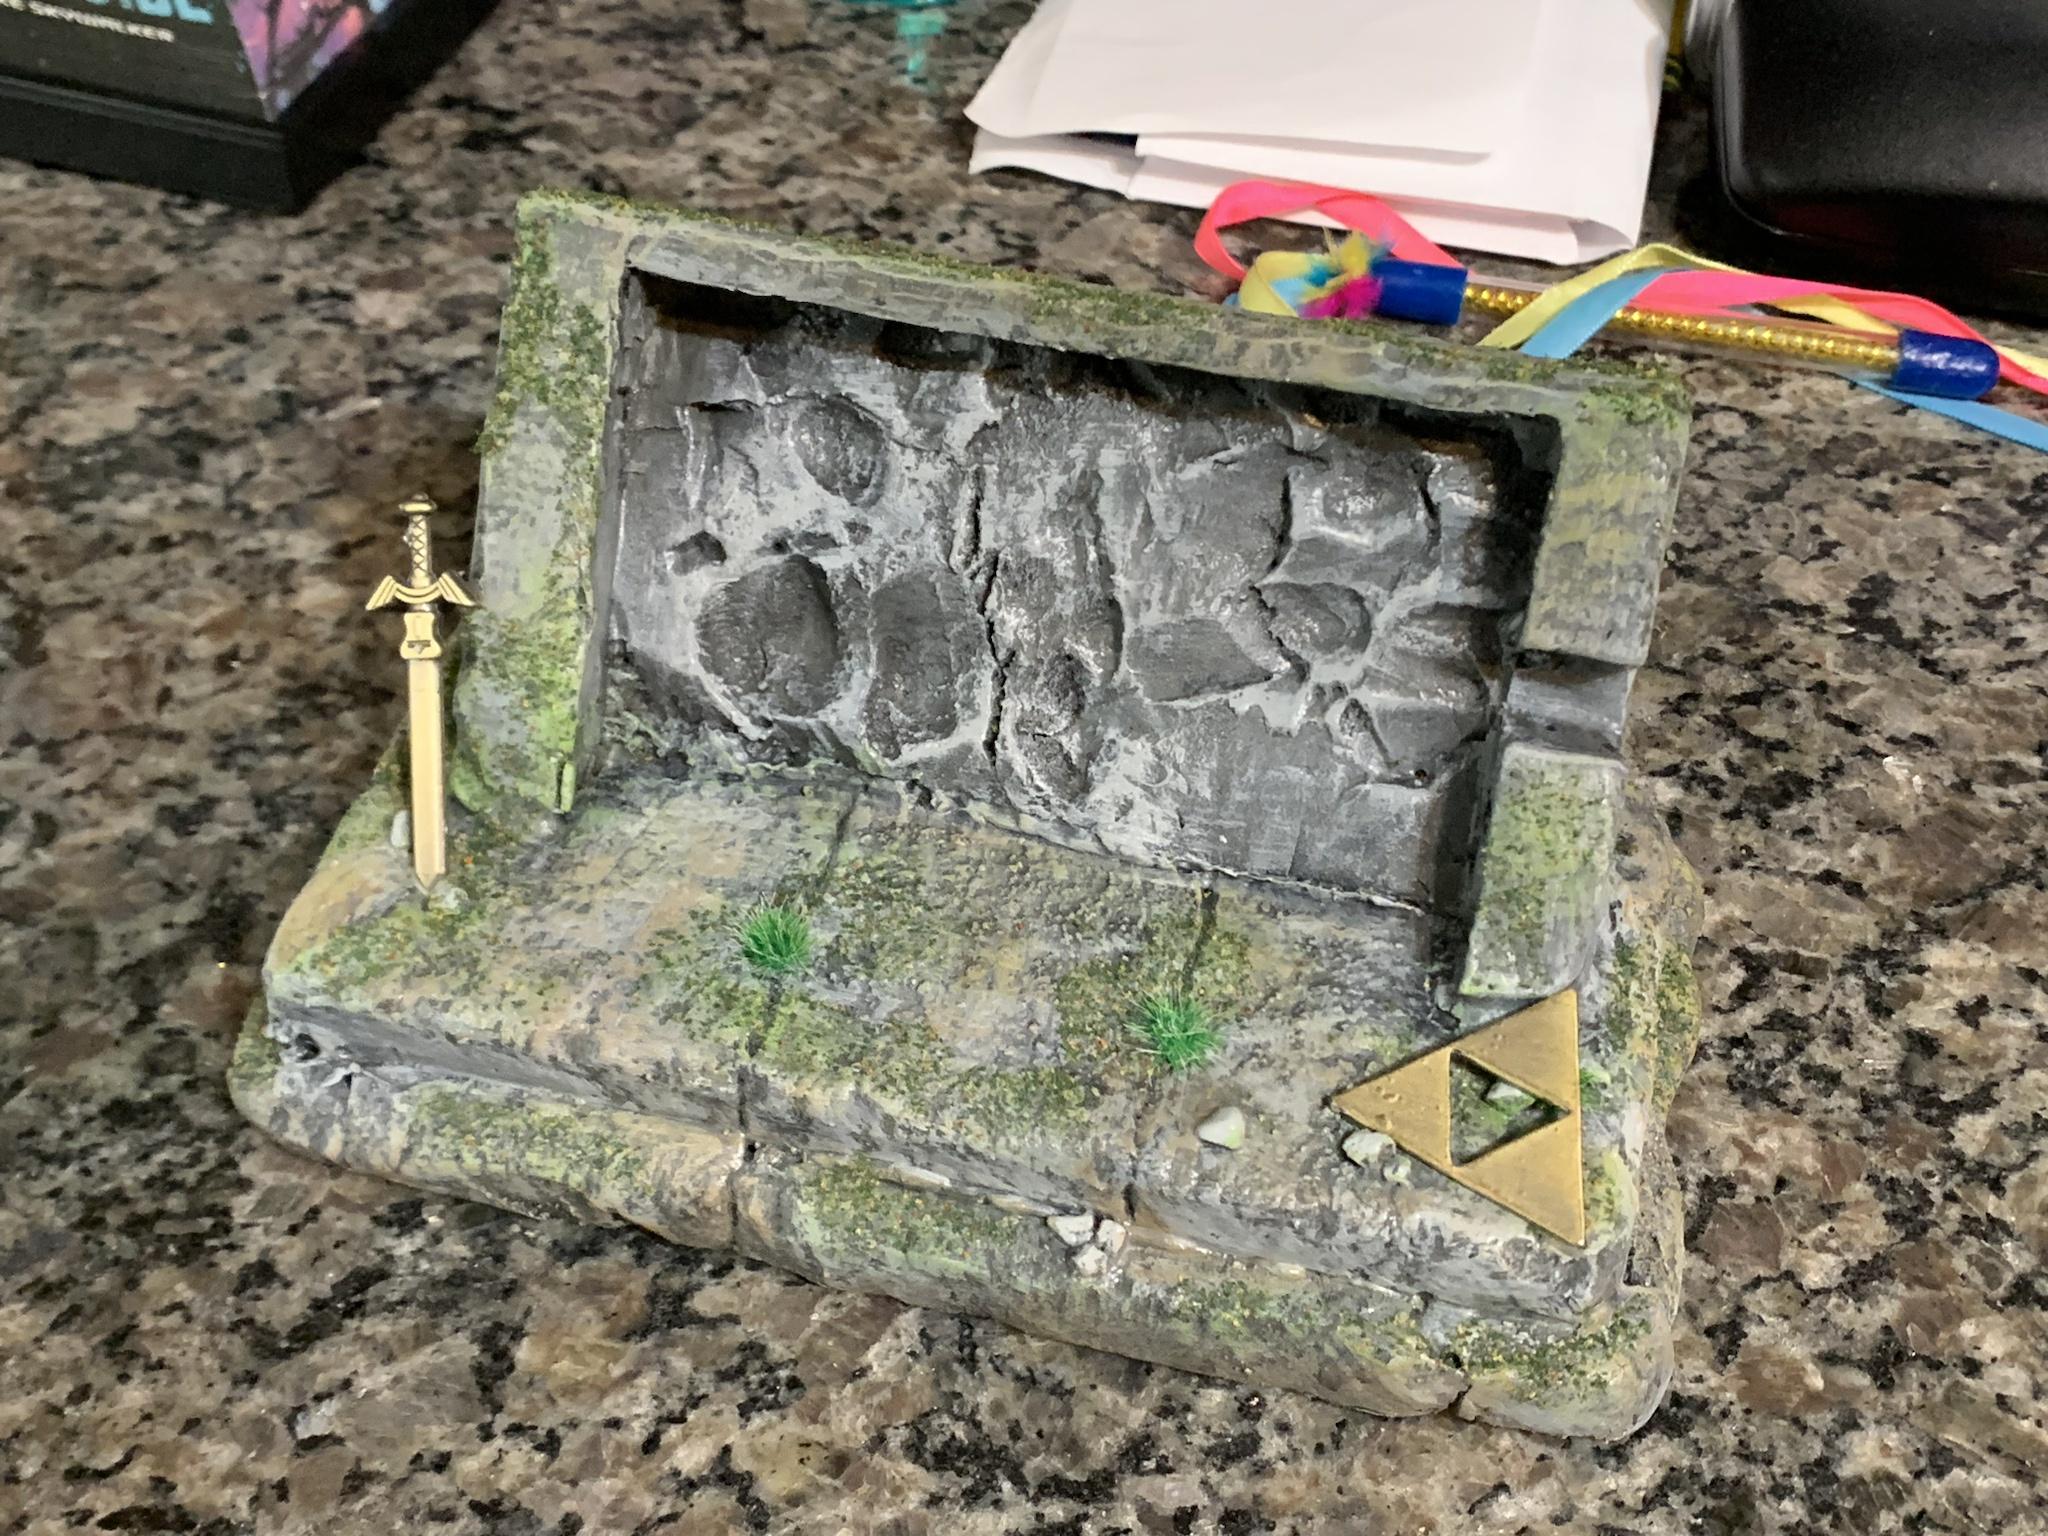
Initially, I had planned on painting my tiny Master Sword to look more closely to the in-game sword. After actually painting it, however, I found the end results to look a bit tacky and out of place. I stripped off the paint and decided to use the sword with its original coloring. I think both elements fit perfectly in the end!
I wrapped the project with a coat of Tester's matte clear coat varnish. The finished product now sits on my nightstand: the perfect home for my beloved little handheld.
